Saturday, September 30, 2017

"RIGHT" TIME OF YEAR

It's the RIGHT time of year to share some tips for helping children discriminate their right and left hands.

RIGHT
Focus on the right hand because then what is “left” over will be their left.


Sticker
Put a sticker on each child’s right hand and then play “Simon Says” or the “Hokey Pokey.”

                                  
Bracelet 

Let children make bracelets out of pipe cleaners and wear them on their right hand. Throughout the day call attention to their right hand…right ear…right leg…right foot, etc.

Lotion 
Rub lotion or scented lip balm on each child’s right hand.
Flag 
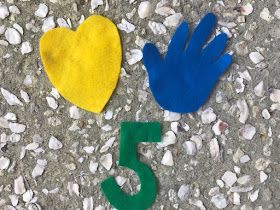
Trace around your right hand on construction paper and cut it out. Place it near the flag so children can visually match up their right hand and then place it over their hearts.
          
Poem 
Hold up your hands and stick out thumbs and index fingers as you say:
          Which is my left? Which is my right?
          Sometimes it’s hard to tell.
          But when I stick my thumbs out straight,
          My left will make an “L.”

                                                                                   
Left From Right (Anthony Corbo aka “Mr. Kindergarten” taught me this song.)
 (Tune: “Mary Had a Little Lamb”)
         I want to learn my left from right,
         Left from right, left from right.
         I want to learn my left from right,
         I try with all my might.
         The left hand makes the letter L,
         Letter L, letter L.
         The left hand makes the letter L,
         Hurray, now I can tell!

Right & Left  
Teach children this song to the tune of “Up on the Housetop.”
         Here is my right hand way up high.
         Here is my left hand touch the sky.
         Right and left and roll out of sight.
         Now I know my left and right.

Note! Hand dominance is established when either the right or left hand is consistently used for writing, eating, or throwing a ball. Most experts claim hand preference begins in preschool years and that by kindergarten there is a preferred hand.

Friday, September 29, 2017

BLOOM KEEPS BLOOMING!

I studied Bloom’s Taxonomy in graduate school 4 decades ago, but it’s as valid today as it was in the 70’s. Benjamin Bloom developed a hierarchy of assessing thinking that gives you insight into the student’s processing and depth of understanding. 
                                      
Level One: Knowledge – Ask students to identify and recall information.
Level Two: Comprehension – Ask students to organize information or put it in another form.
Level Three: Application – Have students use facts, rules, and principles.
Level Four: Analysis – Ask students to break information into parts.
Level Five: Synthesis – Invite students to compile information in a new way.
Level Six: Evaluation – Ask students to develop an opinion or make judgments.


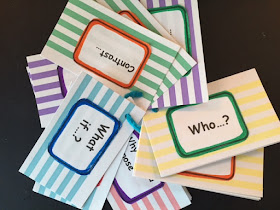
Many times when teachers are evaluated they are criticized for not using higher order questions. I’ve created these prompt cards that may help you improve in this area. You can download them and then cut out the ones that are most appropriate for your grade level. Glue them to index cards, punch a hole, and attach them to a book ring.
https://drive.google.com/file/d/0B1SnEagA4jljVTNCemZnbUJVMVk/view?usp=sharing                                 
*Hint! Color code the different levels. For example, you could outline level one questions with a green marker. Outline level two with a blue marker, and so forth.
                                                

Thursday, September 28, 2017

THAT'S A GOOD QUESTION!!!

Have you ever heard of the 20-80 principal? About 20% of your effort at something yields 80% of the results. In other words, you can teach smarter doing some simple things that can impact learning in a big way. You might want to try one of these questioning strategies each day and then reflect on the children’s responses.
                                       
1-2-3 Tell – Ask a question and then slowly count, “1, 2, 3.” When you say, “Tell,” the children all say the answer.

Thumbs Up Thinking – Tell children to stick up their thumb next to their chest if they have learned something. Stick up fingers for each additional thing you’ve learned.

Whisper & Release – Children whisper the answer in their fists. When the teacher says, “Release,” the students open their fists.

Right Now! Right Now! Right Now! – Children stop and freeze. Teacher asks, “Who can tell me something right now that they’ve learned that they didn’t know when they came to school this morning?”

Sign Language (Yes/No) – Teach children the signs for “yes” (wiggle fist in the air) and “no” (touch index and middle finger to thumb like a mouth closing). You can also use cards with “Yes” and “No” written on them.

How Much Do You Know? - Children hold up on their fingers from 1-5 to indicate how much they know about a particular topic.

Engage All Students - Call on students who raise their hands as well as those who don’t.

Phone a Friend – If children don’t know the answer, allow them to phone a friend (place hand by mouth and ear like a phone) for help.
*They could also “ask the audience” for help with an answer.

Pick Sticks – Ask each child to write his/her name on a large craft stick. Color one end green and one end red. Place the red end in the bottom of a can. Ask a question, and then choose a stick. That child gets to answer the question. Return their stick to the can with the red end up.

                         
Think Partners – Divide children up into pairs and let them discuss answers.
Children can also review information by “teaching” a friend what they have learned.

Written Response – Ask children to write the answer to a question.

Illustrated Response – Have children draw the answer to a question.

Choral Response – Children answer in unison.

Brainstorm – Brainstorm as a large group, small group, or individually.

KWL – Know, Want to Know, Learned – When introducing a new theme or concept make a list of what the students already know about the topic and what they want to learn about the topic. During the study they can be encouraged to write what they are learning.
*KWL can be done as a class or individually.

Question of the Day – Write a thought-provoking question on the board each day. Take time to listen to children’s responses at the end of the day.

Student Created Questions – Let students generate their own questions for a review.

Wednesday, September 27, 2017

??? QUESTIONS???

One of the most powerful teaching strategies isn't something you buy or plug in.  It's the ability to ask GOOD questions that make children think.  Over the next few days I'll try to give you some practical tips and strategies.

Why ask questions?
*Spark children’s interest
*For assessment
*To evaluate teaching effectiveness
*To see where students are to set new goals
*Evaluate children’s level of understanding
*Motivate students to seek information
*To encourage children to see new relationships
*To challenge children to think critically
*To help students make personal connections with the information
*To encourage communication and learning among students
*To summarize and evaluate


Open-ended – Ask open-ended questions, rather than “yes” or “no.”  Convergent questions have one answer, but divergent questions encourage students to make new connections and think outside the box.

Phrase Questions Clearly – Focus on one aspect at a time.

Acknowledge Responses - Avoid judging answers by repeating their response. “Good thinking!” “That’s close.” “I never thought about that before.” “Kiss your brain!”

How did you know that? Encourage children to “think out loud.” This will help peers develop higher thinking skills.

Probe – Extend students’ thinking by having them clarify an idea or support an opinion.

Give Time (Smile! J) – Help children think about what they want to say and provide for individual differences by asking children to smile if they know the answer. Allow at least 3-5 seconds of think time.

Pause – Pause a few seconds after students have responded. This may encourage them to think more deeply or to elaborate.

Come back tomorrow for some specific strategies that are easy to implement and could have powerful results!

Tuesday, September 26, 2017

HEIGH-DE-HO AND HEIGH-DE-HAY

Heigh-de-ho, heigh-de-hay,
How about some new ideas today?


It doesn't take much to make me happy.  Just looking through old files of ideas and finding gems like these makes my day.  And, I hope you'll find something here to make your day!

3 –H Good-bye
Heigh-de-ho, heigh-de-hay,
Sure am glad you came today.
Before you go, what do you say?
Hug, handshake, or high-5 today?
*Children choose if they want to give the teacher a hug, handshake, or high-5 before they leave the classroom.

                                    
Brain Nap (Elsa Jasso, El Paso) 

When you need a few minutes to talk to the principal or deal with something tell the children, “Close your eyes and take a brain nap.”


Zip It, Hip It, Lip It! (Erin Mensing) 

To get the children ready for the hallway say: 

Zip it. (Pretend to zip lips.) 

Hip it. (One hand on hip.) 

Lip it.(finger on

Kindness Sprinkles (Christin Cannan)
“Sprinkle” kindness (hands up and wiggle fingers) on the Star of the Week, Birthday Child, or for other occasions. 


Good Job Rally (Veda Hamrick) 


Have children form two lines facing each other. One at a time children walk between the two lines as friends give them "high five" and say, "Good job!" 


Hallway Hug (Jodi Spakes)
When children see friends in the hall teach them to do the hallway hug.
You (Hold up index finger.)
Me (Hold up middle finger.)
Hello (Cross middle and index finger and wiggle.)

Air Hug (Mary Katherine Ellis)
Open your arms as if giving a huge hug in the air.
*This is good for when students see a friend in the hall.
*This is also good when someone comes in or leaves the classroom and the kids want to jump up and give them a hug.
                                                            
Problem Resolution (Carrie Thouvenot)
After students resolve a problem they can follow this routine:
1st - Fist bump
2nd - Hand shake
3rd - High five
4th - Hug
5th - Walk away happy!
                    
Mirror Talk
If children talk ugly to a friend, then tell them to go talk like that in the mirror and see how it feels.

Monday, September 25, 2017

COMICS ARE TIMELESS

Did you know that today is National Comic Book Day? What a treat when I was a kid to get a new comic book! No, we didn’t have videos or computers, but friends would come over and we’d read comic books together. I know! I know! Sounds corny now, but it was a favorite indoor pastime when the weather was bad. Let me tell you, if the weather was good our mothers would say, “GO OUTSIDE AND PLAY!”

I also remember sitting on my grandpa’s lap as he’d read the Sunday comics to me. I think the cartoons were much more “child friendly” in the 50’s than they are now. However, it might be interesting to save some of the comics from the newspaper this weekend and share them with your class. Explain how cartoonists use “bubbles” to let you know what the characters are saying.
                             
Invite children to draw a picture of you and make a bubble with something you frequently say coming out of your mouth. You might be surprised!!!!

You could also let the children draw pictures of themselves or their friends and then use bubbles to make them talk.

Comics can also be used to reinforce standards. Start off by giving children copies of a cartoon frame with 2 sections. Tell them to think of a story that has a beginning and an end and draw it.

Next, let them think of a story with a beginning, middle, and end.

Finally, challenge them to create a story with 4 sections.

*Have children recall the sequence of a story with comic frames.

*Use comic frames to illustrate the life cycle of a butterfly, the water cycle, plant growth, and so forth.

Here’s a link to download blank cartoon frames:
                             
https://drive.google.com/file/d/0B1SnEagA4jljTjMyU21nWDZTN00/view?usp=sharing 

Cartoons That Move
Would you like to learn how to make cartoons that move? It’s easy peasy, but you’ll surely impress your students when you teach them how to do this.

Hint! I would only do this with primary grade children.

Materials: white copy paper, stapler, black pen or pencil

Directions:
1. Fold the paper into fourths and cut on the creased lines. 

                  
2. Take two sheets and staple them at the top.
3. Lift the top layer and draw a simple shape on the bottom. Keep your drawing on the bottom half of the page. 

              
4. Now, place the top sheet over the bottom and trace over the lines. Vary one or two features, such as arms, ears, mouth, etc.
5. Take a pencil and roll the top sheet up around the pencil.
6. Quickly move the pencil up and down to bring life to your cartoon. Waalaa!
                                 
*Connect this activity to literature, science themes, or social studies. 

Sunday, September 24, 2017

TEN THINGS ADMINISTRATORS NEED TO KNOW!

I'm getting on my soap box today.  It breaks my heart to hear stories from teachers about how frustrated they are.  I thought I might help you by giving administrators a little advice.  What do you think about my list?  Would you like to add something to it?  How can we "hold hands" and make your job more enjoyable and satisfying?
                                                                                     
O.K. I admit that I’ve never been an administrator. I know that the expectations of the job are beyond what any person is capable of doing. However, I’ve been at this rodeo a long time and administrators and educational decision makers need to realize that there is a CRISIS now! Teachers are the heart and soul of our schools and they are stressed, burned out, frustrated, and depressed. In other words, TEACHERS ARE GETTING BEAT UP! Beat up with paperwork, assessments, evaluations, criticism, and lack of support.

It makes me sad as I travel across the country and listen to classroom teachers. Teaching used to be a lot more fun. We got our class list, shut our door, and did our best to help our children learn. I enjoyed going to work and one of my major goals was to have happy students who loved coming to school. If teachers aren’t happy, how are children going to be happy. And, at the end of the day, isn’t that what life is all about?

Based on teachers’ comments, here are some suggestions I’d like to offer administrators and educational decision makers.

Ten things administrators need to know!

1. Let your teachers TEACH. Give them autonomy to do their jobs and TRUST them to do what’s best for their students.

2. If you’ve never taught the grade level, you should NOT make skill lists or set expectations.

3. Support your teachers. Be careful not to let a single parent’s request sway what’s best for their child and the other children in the classroom.

4. Believe in the WHOLE child. A test score is a number. “You can’t see the forest for the trees.” And, sometimes, you can’t see that wonderful little person because of “data.”

5. The word “rigor” is not appropriate when talking about instruction for young children. The world keeps changing, but children are still children. They don’t all grow up in the same way at the same time, and they should not be expected to accomplish skills according to some master plan.

6. Please don’t give teachers any more paperwork. Assessment and reports are driving instruction and consuming their day.

7. Teaching is a video not a snap shot. Is it fair to walk in a classroom, observe for 10 minutes, and then make negative comments to the teacher? Compliment teachers for what they are doing well. Give positive suggestions instead of critical remarks.

8. Be a real person and a good model for your teachers. Visit each classroom and do something FUN by reading a book, teaching a song, telling a joke, or doing a magic trick.

9. Don’t take away their JOY! If the children are engaged and enjoying an activity, do you have to ruin it by requiring “observable evidence”? Let it be! It’s O.K. to read a book without dissecting it with questions about the author’s purpose. It’s O.K. to take a walk outside to enjoy the peace and beauty of nature. It’s fine to sing a song or use a brain break to make children smile.

10. Remember that for some of your students “school” is as good as it’s going to get for them. You never know what’s going on at home, and school should be a wonderful world where they feel accepted, successful, and excited about learning.


TEACHERS WHO LOVE TEACHING MAKE CHILDREN WHO LOVE LEARNING!

WHAT CAN YOU DO TO HELP YOUR TEACHERS LOVE THEIR JOBS?

Saturday, September 23, 2017

THE DOT

I was thrilled with the book my friends shared with me in Bowling Green last week. If you’ve never read THE DOT by Peter Reynolds you can find out more about it by visiting www.thedotclub.org.

                               
I think we’ve all had experiences similar to Vashti where we think, “I can’t draw.” “I can’t sing.” “I can’t dance.” “I can’t do statistics.” “I’ll never be able to cook.” Etcetera, etcetera. The book is a beautiful lesson for children about just getting started and TRYING!

THE DOT also reminded me of some simple art activities we can do with our students.  These activities are open-ended and can be used with any age or integrated with a unit of study.

Sticky Dot
Materials: sticky dots, paper, crayons or markers
Directions: Give each child a sheet of paper and a sticky dot. Ask them to place the dot anywhere they’d like on the paper. Next, challenge them to create something out of the dot.
           

Dot to Dot
Materials: 2 dice, paper, crayons
Directions: Children roll the dice and add up the dots. They take a black crayon and make that number of dots randomly on a sheet of paper. Can they connect the dots and create something out of it?

                         
*Have children make dots and then exchange papers with a friend.

Negative Space
Materials: paper, scissors, markers or crayons
Directions: Cut a hole out of the middle of each sheet of paper. Ask children to look at the hole and then create an object out of it.
                                       
*Extend the activity by having children write about their pictures.

Wiggles and Squiggles
Materials: crayons, paper
Directions: Have the children close their eyes and make a design on their paper with a black crayon. When they open their eyes, have them turn their paper all around and try to create something out of their design.

                                                            
*Have children exchange papers of wiggles and squiggles with a friend.

Friday, September 22, 2017

SOCK SOUP

My friend Pat Gusoff sent this idea that she did last week. Talk about WIN/WIN!! Children learned math, developed small motor skills, had fun, and helped others!
I purchased about 40+ pairs of children's socks - Batman, Spider-Man, Paw Patrol, hearts, unicorns, pink, purple, striped, polka dotted, etc. for my class to sort and match. I put the socks in two bowls that I named "Sock Soup." What a great way to reinforce the number 2 and pairs! We did all sorts of matching activities and the children had to use their fine motor skills to clip their pairs with clothespins. After 3 days of fun (including a sock hunt in the hall with a clothesline to hang up the pairs) we went to our Temple office and delivered our socks to the large pile of other donations for the hurricane victims - our mitzvah of the month!  (Temple Trager ECEC in Louisville, KY) 
            
I'm only sharing this with you as an idea of what small hands and big hearts can accomplish!

Thanks for being there so I can share with someone who continues to care!


And thanks to all of you for visiting my blog so we can keep sharing as we pass on the torch to other teachers!!!

Thursday, September 21, 2017

THE HURRICANE STORY

Someone recently asked if anyone had a book about a hurricane. I wasn’t familiar with a book about a hurricane, but I decided to adapt my “Rainhat Story” to make a positive twist on a frightening experience for children. Hope you’ll enjoy sharing it with your class.
                              
https://www.youtube.com/watch?v=bAH8x6ULVeE&feature=em-upload_owner#action=share


Here’s a link to the original “Rainhat Story” so you can learn how to tell it. It’s one your children will want to hear over and over again.
                            
https://drive.google.com/file/d/0B1SnEagA4jljM1VPUU1RLXh2X2s/view?usp=sharing

Wednesday, September 20, 2017

ALLITERATION

Hooray!  Hooray!
It's Facebook Wednesday.
See you at Five this afternoon!

Which One Doesn't Belong?
Say a series of words that begin with the same sound. Say one word that does not begin like the others. Children listen and identify the word that does not belong. 
 For example: sun, sand, top, see (top); boy, house, big, ball (house)

Bappy Birthday
Sing the birthday song by inserting the first sound in the child’s name for each word. For example, Beth’s birthday song would be:
          Bappy birthday bo bou…

*You can also insert the sound that the child’s name begins with in “Tooty Ta” and “Batman.”

Hint! If their first name begins with a vowel, use the first sound of their last name or middle name.

Hand Phone
Have children cup one hand around their ear and the other hand in front of their mouth. The teacher says a series of words that begin with the same sound as the children repeat.

Marvelous Monday
Think of adjectives for the days of the week and months of the year. 
For example: Thrilling Thursday or Marvelous May.

Songs
Sing “Pepperoni Pizza”, “Bubble Gum”, and other songs where alliteration is emphasized.
          Pepperoni Pizza
          I like to eat, eat, eat,
          Pepperoni pizza.
          I like to eat, eat, eat,
          Pepperoni pizza.
          Bi bike bo beat, beat, beat
          Bepperoni bizza...
          Mi mike mo meat, meat, meat
          Mepperoni mizza…
          Li like lo leat, leat, leat,
          Lepperoni lizza…
          Ri rike ro reat, reat, reat,
          Repperoni rizza...
          Zi zike zo zeat, zeat, zeat,
          Zepperoni zizza...
          Yi yike yo yeat, yeat, yeat,
          Yepperoni yizza...

*Use this song for other consonants and vowels.

          Gumball
          I put a penny in the gum slot.
          I watched the gum roll down.
          I get the gum and you get the wrapper,
          Cause I put the penny in the gum slot.

Sing substituting the initial consonant sound of each word with “B,” “N,” “P,” “G,” “L,” and “F.”
                                
                       
Activities: Cut out paper gumball machines and write different letters from the song on 
them. Substitute other consonants, blends, and diagraphs in this song.


Tuesday, September 19, 2017

SYLLABICATION

You'll find reading skills today,
but PLAY ideas on Wednesday.
I'll see you then on Facebook LIVE
Don't be late - see you at FIVE!
Move It! 
Clap, hop, walk, or nod the syllables in children’s names and classroom objects. Disco, hula, swim, or march to syllables in rhymes and songs.

Hickety Pickety
Slowly clap hands to the beat as you say the chant below.
          Hickety, pickety bumblebee
          Who can say their name for me? Child’s name.
          Clap it. (Clap out syllables as you say the name.)
          Snap it. (Snap syllables in name.)
          Whisper it. (Whisper name.)
          No sound. (Lip sinc name.)

Instruments 

Have children beat out syllables with instruments. You could also use cardboard rollers, straws, pencils, etc. like drum sticks to tap out rhythms and syllables.

Syllable Show 
Slowly say a word. Children hold up the number of syllables they hear on their fingers.
                                 
*You could also let them show the number of syllables by placing the appropriate number of poker chips or popsicle sticks on their desk.

Mouth It

Have children gently place their palm under their chin and ask them repeat to words. Surprise! The mouth opens on each syllable (all syllables have vowels and the mouth opens).

Sound Sack
Take a small sack and fill it with common objects or small toys. Engage children’s attention with this song to the tune of “I’m a Little Teapot.”
What’s in the sound sack, who can tell?
Maybe it’s a book or maybe it’s a shell?
What’s in the sound sack, who can say?
Blend the sounds, you’ll know right away!
            
Choose an object and stretch out the sounds. When children can blend the sounds and say the word, remove it from the sack and place it on the floor. Before putting each item back in the bag, segment the sounds again.
*Start with compound words. When children are successful with that, use objects with two syllables. Finally, children will be able to blend individual phonemes.

Finger Tap 
Bend in your fingers and extend your thumb. Going from the left tap a finger for each sound with your thumb.
For example: /j/ /e/ /t/. Run your thumb over your fingers as you blend the sounds and say the word.

*You can do a similar activity by extending your left arm in front of you. Make the first sound as you touch your shoulder, the second sound as you touch the elbow, and the third sound as you touch the hand. Then quickly sweep the right hand down your left arm as you blend the sounds and say the word.


Monday, September 18, 2017

IT'S PHONOLOGICAL AWARENESS WEEK!

Phonological awareness is the ability to recognize sounds in oral language (rhyme, alliteration, syllables, etc.). Children must first hear the sounds before they can relate them to letters (phonics). Let's start today with rhyming. Learning to rhyme doesn't happen it one lesson...it takes a lot of oral language (nursery rhymes, finger plays), songs, books, and games to help children develop this skill.

Rhyme Detectives

Tell the children that they will get to be detectives andlisten for words that rhyme. You say a word, and they put their pinkies up if they hear a word that rhymes with it. Pinkies down if it doesn’t rhyme.
For example: Cat - hat (pinkies up), run - dog (pinkies down).
      
Handy Rhymes 
Have children extend their arms as they say pairs of words that rhyme. For example: sun (extend right hand) - fun (extend left hand). As they progress, the teacher says a word as children extend their right hand.

Rhyming Song 
Do this activity to the tune of “Skip to My Lou.”
          Cat (hold out right hand)
          Hat (hold out left hand)
          Those words rhyme.
          Cat (hold out right hand)
          Hat (hold out left hand)
          Those words rhyme.
          Cat (hold out right hand)
          Hat (hold out left hand)
          Those words rhyme.
          They all end with “at.” (Roll hands around as you say this.)


Rhyme Puzzles 
Cut paper plates in half using puzzle designs similar to those shown. Glue pictures that rhyme on each half. Mix up the pieces. Children say the words and match up the plates that rhyme. The game is self-checking because the pieces will fit if they match the correct pictures. 
*You can also use season shapes to make a rhyming game.
                                                    
Rhyme Ball
You will need a ball, beanbag, or other object to toss for this game. Children sit or stand in a circle. The teacher says a word and then tosses the ball to a child. As the child catches the ball, she must say a word that rhymes.

Riddle Rhyme Game 
Let children make up their own rhymes in this game. First, they choose an object in the room. Next, they say a word that it rhymes, along with another clue. For example: “This rhymes with hair and it is something you sit on.” “This rhymes with look and it is something you read.”

Rhyme Bag
Give each child a lunch bag and for homework ask them to bring two objects that rhyme.  As they take turns sharing their items encourage classmates to think of other words that rhyme with their objects.
                                  

Join me for Facebook Live
This Wednesday at Five.
I've got fall ideas galore
and maybe even a little more!!