Monday, August 31, 2020

QUIET MAN AND QUIET HANDS

No matter what your teaching situation is this fall, you'll need some tricks to focus children's attention.  Here are tried and true "tips" teachers have shared over the years.

QUIET Man (Candace Reed)
Make "quiet man" with your fingers by sticking up pinky and pointer and touching thumb, ring man, and tall man. When the teacher holds up "quiet man" the children respond by making "quiet man" and focusing on the teacher.


Magic Triangle (Cathy Crady)
Remind children that they all have a magic triangle in their pocket. (
Place pointers and thumbs next to each other to form a triangle.) When the children need to calm down ask them to take out their magic triangle and hold it in front of their mouth. Tell them to take a deep breath in through their nose, and then slowly blow through the triangle.


Body Check

Remind children to listen with their eyes, ears, and bodies.
*Teacher: Are your eyes looking at me?
Children: Check!
Teacher: Are your ears ready to listen?
Children: Check!
Teacher: Are your bodies sitting quietly?
Children: Check!
Teacher: Are you ready to learn?
Children: Check!

Looking!
I am looking.
What do I see?
I see (child's name) sitting (listening, etc.)
Properly.

Hint! Lower your voice each time you say this using a different child's name until they are all quiet.

Breath through Your Nose 
Tell children to slowly breath in and out their noses. It’s surprising how this will calm them – and they won’t be able to talk!

Signs
Run off a copy of a giant ear and tape it to a stick. When you hold up the ear children know they need to listen with big ears!


Close Your Eyes
Have children close their eyes as you give directions. Who can open their eyes and repeat what you said?

Criss Cross
Criss cross, (Fold arms across chest.)
Be your own boss. (Nod head.)


Sunday, August 30, 2020

TIC TAC TOE HOMEWORK

“Parents are their CHILD’S FIRST AND MOST IMPORTANT TEACHER.”

Prepare activities that will encourage parents to continue to extend learning beyond the screen.

Tic Tac Toe at Home
Use a frame similar to the one shown with activities children can do with their families. Can they get three in a row or do they want to do the whole frame?


*Adapt the tasks below to the age and ability of your students to create tic tac toe frames each week.

Read a book.
Tell a joke. 
Exercise. 
Sing a song.
Play hide and seek.
Hum.
Say a nursery rhyme. 
Play a card game.
Talk. 
Make a puppet.
Juggle two paper towels. 
Swing.
Sit on the floor together. 
Build something with blocks.
Blow bubbles. 
Go outside and take a walk.
Cut pictures out of magazines. 
Skip.
Play a board game. 
Skate on paper plates.
Count. 
Look out the window.
Go on a nature walk. 
Make a wish.
Jump or hop as long as you can. 
Do a job together. 
Play a memory game. 
Write a letter.
Cook something together. 
Do a finger play. 
Work a puzzle. 
Make a band of pots and pans. 
Pantomime. Guess who I am? 
Play “I spy.”
Draw a picture.  
Put on a puppet show. 
Make a book. 
Make a card for someone. 
Play a rhyming game. 
Play with play dough.
String pasta or cereal on dental floss.
Draw with chalk on the sidewalk.
Play follow the leader. 
Make silly faces in a mirror. 
Draw a picture. 
Put on some music and dance.
Give each other a back rub.


Monthly Activity Calendars
You can also download monthly activity calendars on drjean.org.

http://www.drjean.org/html/monthly_act/act_2011/07_Jul_css/pg03.html

Saturday, August 29, 2020

THE COLOR FARM

This is a song your students will enjoy singing, but there are lots of standards “camouflaged” here. 

*This song reinforces the concept that when you put letters together you make a word.
*Children can learn to read the color words.
*More advanced children can learn to spell the color words.

The Color Farm
(Tune: “BINGO”)
There was a farmer had a cat
And Black was her name-o
B-L-A-C-K (Clap on each letter.)
B-L-A-C-K
B-L-A-C-K
And Black was her name-o.

Dog – BROWN
Cow – PURPLE
Horse – GREEN
Duck – ORANGE
Bird – BLUE
Chick – YELLOW
Pig – RED


*Use these patterns to make stick puppets that the children can hold up as you sing.

Write the color word and put a picture clue by it on a sentence strip. Pass these out for the children to hold up as you sing.


Cut a 7” circle out of the top of a file folder. Add ears, tails, and other features for each animal. Children hold it up around their face as you sing.


*Make up additional verses for other colors. For example, a pink flamingo, tan turtle, grey goat, white sheep, etc.


Friday, August 28, 2020

SUPER SIMPLE CRAYON ACTIVITIES

How about some simple art projects that children can do at home or at school using crayons and paper? These can be adapted to any age, and they are activities that children might enjoy doing several times.


Dancing Crayons
Materials: crayons, paper, music
Directions: Hold a crayon in each hand. Put on some music, and let the crayons “dance” on the paper.
*Use a variety of music, such as classical, country, march, lullaby, etc.


Bundles
Materials: crayons, rubber bands, paper
Directions: Wrap a rubber band around 3 or 4 crayons. Children can hold the “bundle” and draw a design or picture on their


Dot to Dot
Materials: crayons, paper
Directions: Make a specified number of dots (six, ten, whatever) on a piece of paper. Exchange papers with a friend. Connect the dots. What does it look like? Add details to create an object or design.


Wiggles and Squiggles
Materials: crayons, paper
Directions: Have the children close their eyes and make a design on their paper with a black crayon. When they open their eyes, ask them to create something out of their design.


Folded Designs
Materials: paper, crayons
Directions: Have children take a sheet of paper and fold it several times. Next, open it and trace over the creases on the paper with a black crayon. Finally, fill in each section with a different color, design, or pattern.


Thursday, August 27, 2020

A COLORING WE'LL GO!


Do you remember how happy a new box of crayons made you when you were a child? There was always a lot of “hope” in those sharp, new crayons. I was never a great artist, but I was thrilled with the “possibilities” those crayons offered!

*A good rule of thumb for encouraging children to use many colors in their drawings is to ask them to use as many colors as they are in age. If they are four years old they should use at least 4 different crayons; if they are five years old they should use five colors, and so forth.

*As you read books to the class, explain the illustrator’s name. Have children notice details in illustrations. Why is it important to add details? Remind them when they draw pictures they are illustrators, too, and they should add lots of details to make their pictures more interesting.

*Encourage children to close their eyes and think about what they want to draw before they begin coloring. “Get a picture in your brain and then you’ll know what you want your picture to look like. It’s like telling a story with your crayons.”

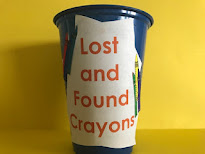
*Keep a cup or box for “lost crayons” on a shelf so children have a place to put crayons that get misplaced.


*Use mint tins to store crayonswhen boxes fall apart.


A Coloring We’ll Go
(Tune: “A Hunting We Will Go” – ALL DAY LONG CD)
A coloring we’ll go.
Hi ho, it’s fun you know,
A coloring we’ll go.

Use straight and curvy lines.
With yellow, purple, green, and orange,
We’ll make our picture fine. (Chorus)

The details we will draw.
Imagine all the little things.
The details we will draw. (Chorus)

We’ll fill in the page.
Use as many colors
As you are in age.

A coloring we’ll go.
We’ll put them in the box and close the top
When we’re through, you know.

Here's a song to help children learn color words.


Color Box
(Tune: “Happy Birthday” MOVE IT! LEARN IT! CD)
Here’s a crayon for you. (Pretend to hold a present in your hand.)
It’s a blue one for you. (Hold up a blue crayon.)
B – l – u – e.
Here’s blue for you.


Continue singing and spelling red, yellow, orange, green, purple, brown, black, white.

*Have children take their box of crayons and hold up the appropriate color as you sing.

*Let children walk around the room and touch objects that are the color you are singing about.

*Have children stand up when the color that they are wearing is sung in the song.

Wednesday, August 26, 2020

CENTER SIGNS

I mentioned these center signs in one of the virtual conferences I spoke at this summer.  Several teachers have emailed asking for these.  Although many of you won't need them when school begins this year, keep them in your pocket and keep on believing that you'll use them one day soon.

I used this idea years ago in my kindergarten to help parents, administrators, and visitors understand the value of active learning. All of my centers had signs that described what children were learning as they played. Below you’ll find some of the captions that I used.

Good teaching is good children and children are children!  Although I used these over 20 years ago before I retired, the meaning is just as valuable today!


Dramatic Play – It looks like I’m playing, but I’m developing social skills, emotional skills, independence, oral language, my imagination, responsibility, and the executive function. I may use these skills as a mother, father, safety officer, or politician one day. 


Blocks - It looks like I’m playing, but I’m developing motor skills, math concepts (number, size, shape, space), oral language, social skills. eye-hand coordination, self control, and my imagination. I may be a builder or architect when I’m grown. 

Art – It looks like I’m playing, but I’m developing my creativity, small motor skills, problem solving, sharing, cooperation, independence and responsibility. I may use these skills as an artist, illustrator, or designer one day. 

Math - It looks like I’m playing, but I’m developing oral language, social skills, small motor skills, concepts about quantity, shape, size, pattern, and an interest in math. I may use these tools as a computer programmer, accountant, or mathematician in the future. 

Library - It looks like I’m playing, but I’m developing alphabet knowledge, oral language, print knowledge, listening skills, eye-hand coordination, concepts about the world, and the desire to read. Maybe I’ll be a publisher, author, or librarian when I grow up. 

Science - It looks like I’m playing, but I’m developing a curiosity about the world, sensory skills, problem solving, language skills, and experience with the scientific process (observing, predicting, experimenting, recording, reporting). If I’m a doctor, lab technician, pharmacist, or landscaper I will utilize these skills. 

Small Motor - It looks like I’m playing, but I’m developing small muscles, eye-hand coordination, attention span, social skills, and concepts about size, shape, color pattern. I might use these skills as a chef or dentist one day. 

Language – It looks like I’m playing, but I’m developing oral language, alphabet knowledge, print connections, phonological awareness, visual skills, book knowledge, phonics, motivation to read. No matter what I become when I grow it, it will be important to know how to read. 

Writing - It looks like I’m playing, but I’m developing eye-hand coordination, small motor skills, alphabet knowledge, self confidence, vocabulary, and an interest in print. I might use these skills one day as a journalist, administrative assistant, or poet. 

Embrace the curiosity, enthusiasm, energy, and JOY of young children and let it be the momentum and springboard for developing skills and meeting standards! Play can be just as “rigorous” as a worksheet. 


                                 LET’S MAKE IT PLAYFUL AND CHALLENGING! 
                              
Hint! You could also make a book with the descriptions and photos of your students working in the centers. Let one child take the book home each evening to share with their families.


Tuesday, August 25, 2020

SAY AND MOVE MATH

Many math concepts can be introduced and practiced as you SAY and MOVE!

Macarena Count to 100
Children stand and do the “Macarena” as they count.
1 (Right arm out palm down.)
2 (Left arm out palm down.)
3 (Right palm up.)
4 (Left palm up.)
5 (Right hand on left shoulder.)
6 (Left hand on right shoulder.)
7 (Right hand behind head.)
8 (Left hand behind head.)
9 (Right hand on left hip.)
10 (Left hand on right hip.)
(Clap two times.)
That is one ten. (Hold up one finger.)
11…100


                                     Watch Macarena Count to 100


Karate Chop Count
Feet out, knees bent, karate chop with your right hand and then your left as you count by ones.
*Do leg curls and chops as you count by 5’s to 100
*Kick front and back as you count by 10’s to 200.
*Wax on, wax off as you count by 100’s to 1000.

Pump Up to 100

Pretend to hold weights as you count.
1-20 - bicep curls (Elbows in, pretend to hold weights in fists with palms up as you bring forearms up and down.)
21-40 - for overhead press (Fists face forwards as you start at your shoulders and push the weights overhead.)
41-60 – side raises (Elbows at 90% angles as you raise them out to the side.)
61-80 – upright rows (Fists together close to the body and raise elbows out and up until fists are at your heart.)
81-100 – frontal raises - (Fists together and arms stiff as you raise them in front of your body to eye level.)
Whew! (Wipe brow!!!) 


Country Countdown 1-20
All right all you cowboys and cowgirls.
Time to count ‘em up and count ‘em down with me.
(Children kick right heel to the ground and then their left heel to the ground as they count.)

1 2 3 4 5 6 7 8 9 10 11 12 13 14 15 16 17 18 19 20 

Turn around and count back down. (Turn around.)

20 19 18 …..

Chant and Write 
(Children echo each line.)

Zero is where it all begins- (Slap thighs to the beat.)
Curve down around and up again.

Number one is so much fun—
Pull straight down and you’ve got a one.

Number two is easy to do—
Up around down and across makes two.

Number three is simple to see—
Draw two humps sideways and that’s a three.

Number four I do adore—
Go down, across, then down some more.

We’ve reached five, now let’s not stop—
Pull down, circle round, put a hat on top.

Number six is easy to fix—
Big curve, small loop will give you six.

Number seven is really sizzlin’—
Straight across, slant down, and that’s a seven.

Number eight isn’t very straight—
Make “S” then back up for an eight.

Number nine I think you’re fine—
A loop on top of a long straight line.

Number ten we’ve reached the end—
Put a one by a zero and count again:

1-2-3-4-5-6-7-8-9-10!

*Write numerals in the air as you chant.


Addition Pokey 
Put 1 finger in. (Hold up finger on right hand.)
Put 1 finger more. (Hold up 1 finger on left hand.)
Shake them altogether (Roll around.)
And then lay them on the floor. (Place on floor or table.)
Add them both together, (Bring hands together.)
And you don’t want to stall.
Now you have 2 in all.

2 fingers…3 fingers…4 fingers…5 fingers


Kitty-Cat! Position Scat!
Kitty-cat, kitty-cat stretch up high; (Point up.)
Kitty-cat, kitty-cat touch the sky.
Kitty-cat, kitty-cat, reach down low; (Point down.)
Kitty-cat, kitty-cat, don’t be slow!
Kitty-cat, kitty-cat, point to the right; (Point right.)
Kitty-cat, kitty-cat, out of sight! (Hands over eyes.)
Kitty-cat, kitty-cat, now point left; (Point left.)
Kitty-cat, kitty-cat, you’re the best!
Kitty-cat, kitty-cat, step out front; (Step forward.)
Kitty-cat, kitty-cat, what a stunt!
Kitty-cat, kitty-cat, walk behind; (Walk backwards.)
Kitty-cat, kitty-cat, please be kind.
Kitty-cat, kitty-cat, crawl below; (Get down on hands and knees.)
Kitty-cat, kitty-cat, to and fro.
Kitty-cat, kitty-cat, climb above; (Pretend to climb up with arms.)
Kitty-cat, kitty-cat, you I love.
Kitty-cat, kitty-cat, go between; ((Put hand between legs.)
Kitty-cat, kitty-cat, don’t be mean! (Shake finger.)
Kitty-cat, kitty-cat, now jump over; (Jump up.)
Kitty-cat, kitty-cat, roll in the clover. (Roll arms around.)
Kitty-cat, kitty-cat, now creep under; (Put right hand under left arm.)
Kitty-cat, kitty-cat, you’re a wonder.
Kitty-cat, kitty-cat, reach to the side; (Reach left and then right.)
Kitty-cat, kitty-cat, smile with pride. (Smile.)
Kitty-cat, kitty-cat, be my friend; (Hold up left hand and pretend to
Kitty-cat, kitty-cat, that’s the end! stroke like a kitten with right hand.)
Kitty-cat, kitty-cat, you know where you’re at.
Kitty-cat, kitty-cat, time to scat! (Slap hands.)
                                

Macarena Months(Dance the Macarena as you say the months.)
January, (Left arm out with palm down.)
February, (Right arm out with palm down.)
March, (Turn left palm up.)
April, (Turn right palm up.)
May, (Right hand on left shoulder.)
June, (Left hand on right shoulder.)
July, (Right hand on back of head.)
August, (Left hand on back of head.)
September, (Right hand on left front hip.)
October, (Left hand on right front hip.)
November, (Right hand on back right hip.)
December, (Left hand on back left hip.)
Then you turn around. (Turn around.)

*End with "There are 12 months, 52 weeks, and 365 days in a year, WHOO!" (Point to the sky on Whoo!)


Monday, August 24, 2020

CAN'T SING, BUT YOU CAN BALANCE!

Did you know that balancing is good for your brain? It strengthens the core and helps you focus. You don't need any equipment or special space. And, as far as I know it won't spread germs,

Note! Experts say that just like any sport the more you practice balancing the better you will become. Balance daily for a week and you might be surprised!

Balancing Brains
Have children stand. How long can they balance on their right foot? How long can they balance on their left foot?

Can they balance on their toes?

Can they balance on their right foot and extend their left leg in the air?

Can they balance on their left foot and extend their right leg in the air.

Can they balance on one foot with their eyes closed?

Can they balance on one foot and count? Count by 2’s, 5’s, 10’s, etc.

Can they balance on one foot and say a nursery rhyme or their ABC's?

Can they balance and say the days of the week, months of the year, seasons, and so forth?


Balancing Act
Here's a video where you can practice balancing with me.

Feet together, close your eyes, (Close eyes breath in and out.)
And breath slowly in and out.
Open your eyes, (Balance on left foot.)
Lift your right foot and balance on the left.
Put your arms out straight. (Arms out wide as you balance.)
Now reach for the stars. (Arms up in the air as you balance.)...
Now close your eyes and slowly breath in and out.
Let your mind take you to a happy place.


Toss and Catch

Have children wad up a sheet of paper and toss it and catch it.  Toss and catch as you count, say your ABC's, read sight words, spell, and so forth.

Sunday, August 23, 2020

SAY, DON'T SING!

Here are some active alphabet songs that you can say instead sing.

ABC Kick Box 

Children stand and make fists with their hands. Explain that you will punch across with your right hand and say a letter. Then punch across with their left hand and make the sound.


A – Punch with right hand
/a/
B - Punch with left hand /b/
C…through Z


Phonercise

Children stand and put their hands in the air as they say a letter. They put their hands on their shoulders and make the letter sound. As they touch their toes they say a word that starts with that sound.


A (Hands up in the air and say “A.”)

/a/ (Hands on shoulders and make the short /a/ sound.)

(Say a word that starts with “A” as you touch your toes.)


*Have older children say words that are nouns, verbs, or other parts of speech as you touch your toes.


Karate Writing
Explain that some letters are tall. They start at the top dotted line. Some letters start at the middle dotted line. Some letters have a tail. They go below the line. Sing the “Alphabet Song” stretching up in the air for tall letters, putting hands on waist for short letters, and touching the ground for letters with a tail. For example:

A -hands on waist
B - hands in air
G - touch ground


ABC Rap Clap
Begin a pattern by slapping thighs once and clapping twice.
A (slap on the letter and then clap twice)
B (slap, clap, clap)
C (slap, clap, clap)
D….Z

Alpha-Bodies
Children stand and as you call out letters they try and make the letter with their body.
*Spell sight words or vocabulary words with their bodies.

Saturday, August 22, 2020

RHYME ALONG WITH ME!


Oral language, phonological awareness, comprehension and other reading skills can be enhanced with nursery rhymes. Rhymes are part of our literary heritage and are great to entertain children during transitions.

Rock and Rhyme
Have children stand and get on their "pony" by putting one foot in front of the other and rocking back and forth as they say nursery rhymes.

Flip Flop Clap
Alternate right hand and then left hand on top as you say nursery rhymes to the beat.


Count with Hickory Dickory Dock
Hickory dickory dock. (Fold hands and tick tock back and forth.)
The mouse ran up the clock. (Run fingers up in the air over head.)
The clock struck one, (Clap one time.)
The mouse ran down. (Run fingers down.)
Hickory dickory dock.

Two – “Yahoo!” (Continue doing the movements above,
Three – “Whopee!” clapping the appropriate number of times.)
Four – “Do more!”
Five – “Let’s jive!”
Six – “Fiddlesticks!”
Seven – “Oh, heavens!”
Eight – “Life’s great!”
Nine – “So fine!”
Ten – “We’re near the end.”
Eleven – “We’re sizzlin’.”
Twelve – “I’m proud of myself.”


Rhyme on with Humpty
Challenge children to fill in the word that rhymes in these additional verses.

Humpty Dumpty sat on a wall.
Humpty Dumpty had a great fall.

Humpty Dumpty sat on a peg.
Humpty Dumpty fell on his leg.

Humpty Dumpty sat on a bed.
Humpty Dumpty fell on his head.


Humpty Dumpty sat on a rose.
Humpty Dumpty fell on his nose.

Humpty Dumpty sat on a pin.
Humpty Dumpty fell on his chin.

Humpty Dumpty sat on a boulder.
Humpty Dumpty fell on his shoulder.

Humpty Dumpty sat on a pie.
Humpty Dumpty fell on his eye.

Humpty Dumpty sat on a deer.
Humpty Dumpty fell on his ear.

Humpty Dumpty sat on the land.
Humpty Dumpty fell on his hand.

Humpty Dumpty sat on the sea.
Humpty Dumpty fell on his knee.


Jack and Jill's Happy Ending
Jack and Jill went up the hill (Move thumbs up in the air.)
to fetch a pail of water.
Jack fell down and broke his crown, (Twirl thumbs down.)
and Jill came tumbling after.
So up got Jack (Thumbs up.)
And said to Jill
As in his arms he took her. (Thumbs hug.)
You’re not hurt, brush off that dirt.
Now, let’s go fetch that water.
So up got Jack and (Thumbs move up in they air.)
Up got Jill to fetch that pail of water.
They brought it back to mother dear
Who thanked her son and daughter. (Fold hands and hug.)


Friday, August 21, 2020

SIGN INSTEAD OF SING

Check out the video I did this week where I demonstrate these activities.

 http://bit.ly/drjeanAlternatives

Sign language is multi-sensory, active, free, and simple!  Someone said that sign language was like bubblegum because it’s a great way to “stick” letters and words in the brain.  It might just be the perfect way to engage children orally and physically without singing. 


The ideas below actually have tunes, but you can just as easily say them.

Note!!  Encourage the children to make “strong” letters. As children tighten up muscles in their hands, they will also be strengthening small motor skills. 


Where Are the Letters?   (Tune:  “Where Is Thumbkin?”)

Where is A? (Place hands behind your back.)
Where is A? (Children repeat.)
Here I am. (Make "a" with your hand.)
Here I am. (Children repeat and make an "a" with their hand.)
What do you say A? (Wiggle hand.)
What do you say A? (Children repeat.)
/a/ /a/ /a/ (Make the short a sound.)
/a/ /a/ /a/ (Children repeat.)


The Alphabet in My Hands  (Tune:  “He’s Got the Whole World in His Hands”)
I’ve got A /a/ /a/ in my hands. (Sign the letter “a.”)
I’ve got A /a/ /a/ in my hands.
I’ve got A /a/ /a/ in my hands
And I can read.
Continue signing and singing other letters.


Letter Box (Tune:  “Polly Wolly Doodle”)

I wish I had a letter box
To put my A in.
I’d take it out and go (Hold up sign for a.)
/a/ /a/ /a/
And put it back again. (Pretend to put hand back in box.)

Continue singing other letters and making signs for other letters.


Go Letters!  

Children stand and roll arms around in between making the manual signs for each letter.

https://www.youtube.com/watch?v=qRCVJ0-nB5M&index=3&list=PL7bsHC8DZJxgo1tIChPhzEYl5gKZuqvof 

Thursday, August 20, 2020

LETTER OFFICE


LETTER OFFICE AND LETTER LOOKER

LETTER OFFICE

Children will enjoy making their very own letter office and then using it for the activities below. First, tape two file folders together.  Let children decorate the outside, and then glue a copy of alphabet letters on the inside. 
Sing and Track
Have children point to the letters as you sing various alphabet songs. (“The Alphabet in My Mouth,” “Who Let the Letters out?” or “Letters You Should Know” all work well.)

I Spy!
Play “I Spy” and other games where children have to identify letters. Can they find the letter that makes the sound at the beginning of “hop”? Can they find the letters in their name? What comes between G and I? Can they match up magnetic letters with the letters in their office?

Partner Play
Use the offices for working with a friend. Read the capital letters, lowercase, consonants, vowels. Read loud, soft, fast, slow, backwards, and other variations. Let friends take turns calling out letters (or sounds) for their partner to identify.

Family Time
Invite children to take their letter offices home and play games with their parents.  

*Take turns naming letters and touching them.

*Sing Alphabet songs and track the letters.

*Look around the house for letters that match.

*Find letters in family members’ names.


LETTER LOOKER

Here’s a simple prop to help your children focus. Loop around the end of a pipe cleaner as shown to make a “letter looker.” Children can identify letters in their letter office and around the classroom with their “lookers.” 
*They can also play a game with a partner with their letter looker. Children take turns focusing on letters as their partner tries to identify it.  

Wednesday, August 19, 2020

"THEY" SAID WE COULDN'T SING!

Good grief! I don’t know who “they” are and if “they” have ever taught little kids, but I doubt if singing a song is actually going to cause Covid to spread. However, it is what it is, so for the next few days I’ll give you some fun “alternatives to singing."

FINGERPLAYS

Most of you who have followed me for years think I’m a broken record when it comes to finger plays. However, if you think about it, they are a perfect tool for engaging children, oral language, math concepts, and developing small motor skills. Finger plays can also encourage children to use their imaginations and their brains!


Here are some videos where you can watch me do finger plays. It might work well to take one or two each week and repeat them every day. Send home copies of finger plays to encourage families to do them together.

https://www.youtube.com/watch?v=4f2d7BW3CzI


https://www.youtube.com/watch?v=H8XqpPYpNCg


https://www.youtube.com/watch?v=PJZGoFWzPA8


https://www.youtube.com/watch?v=WrIxnH8LXNQ


https://www.youtube.com/watch?v=gC-r_pajb6I


P.S. I’m laughing at myself because I can just see me doing these one day in the nursing home!!!


Tuesday, August 18, 2020

JUST A DOT - NOT A LOT!


Just think if you were a little kid and you had never held a bottle of glue before. Wouldn’t it be fun to squeeze it all out? Sometimes we forget that children need directions on how to use school materials. Tell children, “We just need to use a baby dot of glue. Not a mama dot or papa dot. Just a tiny, little baby dot.” (Be dramatic with this and say “baby dot” in a high little voice.) Demonstrate how to put a dot on a sheet of paper. “What does that look like? A little bug? A cookie crumb?”

*Put food coloring in a bottle of glue and use it at a center for children to practice making “baby dots.”

If you use glue sticks, you will also need to demonstrate how to use them. “If you barely touch the page you can’t see anything. That means nothing will stick to it. Press it gently down and then look to make sure you can see something. That means your paper will stick.”

School Glue
(Tune: “This Old Man”)
School glue, school glue,
Just a little dot will do.
Put a dot and spread it around.
It will hold your paper down.
School glue, school glue,
Don’t use more than a dab or two.
When it dries up, it will disappear.
Your work will look good never fear.

Glue Globs

Someone taught me how to make these years ago and I wanted to pass on the idea to you. Children squirt a glob of glue on wax paper. Add googly eyes and let dry overnight. When they are dry, peel off the wax paper, punch a hole, and tie on a string for a necklace. 


P.S.  These are really fun to make at Halloween.

Monday, August 17, 2020

CUT IT OUT!

How about some tips for helping children learn to cut with scissors.


Cutting Tub
You can use a shoe box or a plastic container to make a cutting tub. Insert safety scissors, junk mail, old greeting cards, wrapping paper, etc. in the tub. When you are busy cooking dinner get out the tub to entertain your child.


Hint! Before having them cut, let them tear paper.

Tummy Cutting
Have children lay on the floor and prop themselves on their elbows. If they cut in this position, their elbow will stabilize their arm and give them greater scissor control.

*Wad up two sheets of paper and put one under each arm. As children keep their arms by their sides they will be able to cut better.

Demonstrate and Model

It’s important to take your time, model, and give explicit directions on basic tasks. Remind children to put your thumbs on top, just like "Tooty Ta," when you cut.
Hold the paper in one hand and take little bites with your scissors with the other hand.

Here's a video to share with parents so they can help their children with scissor skills:

https://www.youtube.com/watch?v=vc_KiV2lFaY

Sunday, August 16, 2020

TOP TO BOTTOM

Children can have fun as they practice pre-writing strokes and train their eyes to go from the top to the bottom and left to right.

Top to Bottom Song (Dawna Hunter) 
(Tune: “Head, Shoulders, Knees and Toes”) 
Top to bottom, 
Left to right. 
Top to bottom, 
Left to right. 
My mind knows that writing always goes 
Top to bottom, 
Left to right. 

Pencil Stories
Pencil stories using story symbols can help children develop top to bottom and left-to-right orientation. They’re also an engaging way to develop small motor skills. These stories should be told multiple times so children can practice the pre-writing strokes and feel more competent. You might want to do the same story every day for a week as you invite the children to recall what will come next. 

Here's an easy version I would try with the little ones to encourage them to go from left to right and make a few strokes.

Let's go for a walk.  (horizontal)

The sun is shining down.  (vertical)

The wind is blowing.  (slant)

Here come some raindrops.  (circle)

I hear thunder. (X)

Time to run home!  (horizontal)


Hint! Put a green line down the left side to show them where to start and a red line down the right side to indicate where they should stop.


Write Round the Mulberry Bush
Here's another great pre-writing activity for the beginning of the school year called “Writing Round the Mulberry Bush.” I clearly remember where I got this idea. About 20 years ago I was doing a workshop in Huntsville, Texas. A young teacher said, “My mentor needs to tell you how she teaches handwriting. Her kids have the best handwriting in the school.” Well, she grabbed my attention and when I asked the older teacher her secret she smiled and said they practiced “Writing Round the Mulberry Bush” several weeks before introducing letters. 

Basically, you have children make the strokes as shown on a blank piece of paper as they sing the different verses to the song “Here We Go Round the Mulberry Bush.” It makes sense because children need to go from top to bottom and left to right as they learn to master simple strokes.


Here's a link if you're interested.

https://drive.google.com/file/d/0B1SnEagA4jljSUZWMl9YZVh4UVE/view?usp=sharing

Saturday, August 15, 2020

RIGHT AND LEFT

Training eyes to move from left to right and then reverse sweep is a key to beginning reading and writing. A simple, yet powerful way, that teachers can do this is through modeling. Make it a habit to sweep your hand from left to right under words or lines of print on charts, big books, white boards, and so forth.

Right & Left Song
(Tune: “Up on the Housetop”)
Here is my right hand way up high.
(Hold up right hand.)
Here is my left hand touch the sky.
(Hold up left hand.)
Right and left and roll out of sight.
(Roll hands around.)
Now I know my left and right.
(Hold up left and then right.)

Hint! Focus on the right hand because then what is “left” over will be their left.


Sticker
Put a sticker on each child’s right hand and then play “Simon Says” or the “Hokey Pokey.”

Bracelet

Let children make bracelets out of pipe cleaners and wear them on their right hand. Throughout the day call attention to their right hand…right ear…right leg…right foot, etc.
Lotion
Rub lotion or scented lip balm on each child’s right hand.

Poem
Hold up your hands and stick out thumbs and index fingers as you say:
Which is my left? Which is my right?
Sometimes it’s hard to tell.
But when I stick my thumbs out straight,
My left will make an “L.”


Left From Right(Anthony Corbo aka “Mr. Kindergarten” taught me this song.)
(Tune: “Mary Had a Little Lamb”)
I want to learn my left from right,
Left from right, left from right.
I want to learn my left from right,
I try with all my might.
The left hand makes the letter L,
Letter L, letter L.
The left hand makes the letter L,
Hurray, now I can tell!

Tracking Left to Right
Draw tracks on sentence strips similar to the ones shown. Children can drive cars or move animals from left to right.


Hint! Make a green dot where they are to begin and a red dot where they should end.