Monday, September 30, 2019

IDEA CATCHER!

In the early 1900's musicians who traveled in rural Appalachia collecting old ballads were called "song catchers."  I've always considered myself an "idea catcher" as I've traveled around the US visiting schools and talking to teachers.

Here's a "Survival Kit" they gave the "SUPER HERO TEACHERS" at their SUPER Conference in  Fargo last weekend.  I'm definitely going to "borrow" (aka steal) this idea!


Here are some pictures I took a few weeks ago at the Courthouse Christian Preschool in VA Beach. "Rainbow Fish" is made from bottle caps. You could probably sell that in an art gallery in Manhattan!


What a quick way to display children's work with pant hangers. It'd be so easy to rotate work with these.


Several of the rooms used tree branches and then decorated them with twinkle lights and art projects the children created.


I want to go back to the classroom when I see these ideas!!

Sunday, September 29, 2019

WRITE "RIGHT" WITH PENCIL STORIES

Training eyes to move from left to right and then reverse sweep is a key to beginning reading and writing. A simple, yet powerful way, that teachers can do this is through modeling. Make it a habit to sweep your hand from left to right under words or lines of print on charts, big books, white boards, and so forth.

Right & Left Song
(Tune: “Up on the Housetop”)
Here is my right hand way up high.
(Hold up right hand.)
Here is my left hand touch the sky.
(Hold up left hand.)
Right and left and roll out of sight.
(Roll hands around.)
Now I know my left and right.
(Hold up left and then right.)

Hint!  Focus on the right hand because then what is “left” over will be their left.


Sticker
Put a sticker on each child’s right hand and then play “Simon Says” or the “Hokey Pokey.”

                                  
Bracelet 
Let children make bracelets out of pipe cleaners and wear them on their right hand. Throughout the day call attention to their right hand…right ear…right leg…right foot, etc.

Lotion 
Rub lotion or scented lip balm on each child’s right hand.

Flag 
Trace around your right hand on construction paper and cut it out. Place it near the flag so children can visually match up their right hand and then place it over their hearts.
          

Poem 
Hold up your hands and stick out thumbs and index fingers as you say:
          Which is my left? Which is my right?
          Sometimes it’s hard to tell.
          But when I stick my thumbs out straight,
          My left will make an “L.”


Left From Right(Anthony Corbo aka “Mr. Kindergarten” taught me this song.)
 (Tune: “Mary Had a Little Lamb”)
         I want to learn my left from right,
         Left from right, left from right.
         I want to learn my left from right,
         I try with all my might.
         The left hand makes the letter L,
         Letter L, letter L.
         The left hand makes the letter L,
         Hurray, now I can tell!


Tracking Left to Right
Draw tracks on sentence strips similar to the ones shown. Children can drive cars or move animals from left to right.


Hint! Make a green dot where they are to begin and a red dot where they should end.

Top to Bottom Song (Dawna Hunter)
(Tune: “Head, Shoulders, Knees and Toes”)
Top to bottom,
Left to right.
Top to bottom,
Left to right.
My mind knows that writing always goes
Top to bottom,
Left to right.


Pencil Stories
Pencil stories using story symbols can help children develop top to bottom and left-to-right orientation. They’re also an engaging way to develop small motor skills. These stories should be told multiple times so children can practice the pre-writing strokes and feel more competent. You might want to do the same story every day for a week as you invite the children to recall what will come next. You could also make a tape of the story to put in a listening center. Demonstrate these stories on the board or a large chart so children will be able to copy what you do.

*Older children would probably get a kick out of creating their own “pencil talk” stories.


And here's a new story just right for this time of year!

An Autumn Walk
Let’s take an autumn walk. (horizontal)
The leaves are falling down. (vertical)
Ooooo! Do you hear the wind blow? (diagonal)
There’s some kids throwing the football. (diagonal other direction
The crickets are chirping. (X)
The squirrels are digging holes for their nuts. (zig zag line)
The birds are migrating south. (curvy line)
The scarecrows are standing in the fields. (t)
The pumpkins are getting ripe on the vine. (o)
Time to put on sweaters and hats. (triangle)
What a happy time of year! (smiley face)


Beginners
After I did the above story I realized it would be way too complicated for younger children. Here's an easier version I would try with the little ones. Just to get them to go from left to right and make a few strokes would be a good beginning.


Hint!  Put a green line down the left side to show them where to start and a red line down the right side to indicate where they should stop.


http://drjean.org/html/songs/Playing-index.php

Saturday, September 28, 2019

PENCIL GRIP

It's important to encourage children to use the correct pencil grip when they begin to write. Here are some tips teachers have shared with me.

Silly Band 
Give children a silly band (or rubber band) to go around their wrist. Pick up your pencil and then slip the end of the silly band around the pencil. Explain when you go in the car you wear your seat belt, and when you write you need to put a seatbelt around your pencil. Then you’ll have mom and dad in the front seat and the kids in the back seat!  


Pompom
Place a pompom or cotton ball in a child's hand.  Demonstrate how to put pinky and ring man to “sleep” on the pompom before picking up the pencil.


Writing Bracelet
String a bead or jingle bell to a piece of yarn or string to make a bracelet. Make it loose enough so it can slide easily on and off a child’s wrist. While writing the child wears the bracelet and holds the bead in her hand.
                                       

Bird’s Beak
Point the pencil away from you. Make a bird’s beak by opening and closing your index finger and thumb. Use your beak to pick up the point of the pencil and then flip it back.


Pencil Grip(Melissa Connelly)
Teach children to hold their crayon or pencil correctly with this trick.


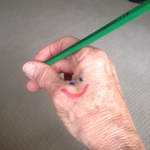
Draw a smiley face on their hand as shown. When they use their pincer fingers their hand will always be smiling at them. 

Pencil Grip Song (Tune:  “Where Is Thumbkin?”)
Where is Pointer?
On the top.
Ready to write.
Start at the top.
Where is Thumbkin?
On the side.
Ready to help
Your pencil glide.
Where is Tallman?
On the bottom.
Keeps the letters
Where you want ‘em.

Want a free download of this song.  Here you go!
http://www.drjean.org/html/monthly_act/act_2017/08_Aug_css/index.html


Friday, September 27, 2019

READY TO WRITE

We are putting THE CART BEFORE THE HORSE when it comes to having children write. Believe it or not, we didn't even teach children to write in kindergarten in the "old days." Lined paper and handwriting were part of the first grade curriculum. Children's hands and small motor skills haven't changed, but our expectations certainly have!!

There are several basic strokes that children need to draw before expecting them to make a letter or number. In order of development, the strokes are a vertical line, a horizontal line, a circle, a cross, a square, a diagonal line, an X, and a triangle. Here are some multi-sensory materials where children can experiment and practice making the pre-writing strokes.


Sensory Tub 
Fill the bottom of a plastic tub with sand, rice, salt, grits, or another sensory material. Encourage children to make the strokes in the tub.

               
*Squirt shaving cream on a laminated table top or lunchroom tray. After free exploration, encourage children to practice making strokes.

Play Dough Book
Use file folders to make this book. On one file folder write “Can you make lines?” and draw lines. On another folder write, “Can you make curves?” and draw curves.   

                   
Write “Can you make shapes?” on another file folder. Make other objects and shapes for children to reproduce on additional folders. Laminate. Hole punch and bind the folders with book rings. 

*Let children use play dough, Wikki Stix, and other materials to reproduce lines, curves, and shapes.

Connect the Dots
Use a marker to make dotted strokes. Put a drop of glue on top of each dot. Dry. Children trace over the dots of glue with their finger. 
             

Hint! Make the first dot green and the last dot red to indicate where to start and stop.

Plastic Needlepoint Canvas
This plastic material that looks like screen can be purchased at most craft stores.    

Place a piece of paper on top and then make strokes and shapes with a crayon. Press firmly for best results. Trace over with your finger.

Rainbow Writing
Make strokes with a black marker. Children take different colors or crayons or markers and trace in multiple colors.
             
• Make giant pre-writing strokes on chart paper and tape to a wall. Encourage children to work together to make “rainbows” from the shapes.

Sidewalk Chalk
Provide children with chalk so they can practice strokes, shapes, and letters on paved surfaces. 

Flashlight
Turn off the lights, give children a flashlight, and let them make shapes and letters on the wall.

Horizontal, Vertical Song
(Carrie O’Bara and Terri Miller) (Tune: “Where Is Thumbkin?”)
Horizontal, horizontal, (Forearms held up horizontally in front of chest.)
Vertical, vertical. (Forearms bent at elbows to form right angles.)
Horizontal, horizontal, Vertical, vertical.
Then diagonal, then diagonal. (Right arm slants in front and then left.)
Add a curve. Add a curve. (Make a “c” with right hand and then left.)
Then diagonal, then diagonal.
Add a curve. Add a curve. 


WANT MORE CNETER IDEAS?  CHECK OUT OUR BOOK!


Thursday, September 26, 2019

CHEERS FOR POMPOMS

Here are activities you can do with the pompoms I demonstrated on
Facebook Live last night.  Talk about active learning!!!!


Materials: lunch bags (2 for each child), scissors, markers, tape

Directions: Draw lines 1” apart halfway down from the top of the bag to the bottom flap as shown. Have the children use scissors to cut down on these strips. Turn the flap over and then roll it up tightly to make a handle. Secure the handle with tape. (For a good small motor activity let the children wrap rubber bands around the handle.) Wrinkle and fluff up the strips to make pompoms.


Note! Let children color their bags favorite team colors before cutting them.

Letter Aerobics 

Put pompoms in the air for letters that start at the top dotted line, out in front of you for letters that start at the middle dotted line, and down low for letters with a tail that go below the line.

*Spell sight words using Letter Aerobics.

Cheer Words
Move and shake pompoms as you spell out names or high frequency words. “Give me a G. ‘G’ I’ve got a G, you’ve got a Give me an O. ‘O’ I’ve got an O, you’ve got an O. Give me a T. ‘T’ I’ve got a T, you’ve got a T. What’s it spell? GOT!”

Songs
Use for “Who Let the Letters Out?”, “Phonercise,” “The Vowel Cheer” and other letter chants and songs.

Invisible Writing
Write letters, numbers, and words in the air with pompoms. (Children call this “air brush” writing!)

Syllables
Clap out syllables in words using pompoms.

Compound Words
Extend pompoms and say each word; then bring together and say the compound word.

Rhymes
Sing this song to the tune of "Skip to My Lou" as you shake pompoms.

Sun (shake right)
Fun (shake left)
Those words rhyme. Sun (shake right)
Fun (shake left)
Those words rhyme.
Sun (shake right)
Fun (shake left)
Those words rhyme.
They all end with "un."

*Continue using other words that rhyme.

Punctuation
Use pompoms for choral reading as children make these motions for punctuation marks.
     Period – Pompom held up like “stop.”
     Question Mark – Touch head with pompom and shrug shoulders.
     Exclamation Point – Pompom up high and shake.

Patterns
Clap out math patterns and have children repeat or extend.

Karate Counting
Pretend to chop from left to right as you count.

Math Facts
Hands in the air and say a number. Touch heads and say "plus" or "minus." Touch waist and say another number. Touch knees and say "equals." Touch floor and say the answer.

Positional Words
Have children follow directions with their pompoms. Can you put them on your head? Can you put them behind you? Can you put them between your knees?

Partner Patty Cake
Have children choose a partner. Let them say rhymes, the alphabet, or count as they patty cake.

Simon Says
Can children play this game and follow directions with their pompoms?

Hint! Take up pompoms and save them in a tub or bag in between activities.

Wednesday, September 25, 2019

"TREE" MENDOUS IDEAS FROM A LUNCH BAG

FACEBOOK LIVE AT FIVE TODAY!
Creativity + Skills = FUN!

Here's a simple craft activity that you can tie into science (seasons), reading (letters and word families), and writing.  It's good for small motor skills and can be adapted to different age levels and skills.

Directions:  Tear or cut 3 or 4 strips half way down from the top of the bag as shown.  (You might want to draw these lines for younger children.)  Open the bag and twist in the middle to make a tree.  


Seasonal Trees
*Tear red, yellow, and orange scrap paper and glue them on the strips to make an autumn tree.

*Pink and white tissue paper can be waded up to make blossoms on a spring tree.

*Use Q-tips to paint white snow for a winter tree.

*What fruits and nuts grow on trees? Let children make their favorite fruit tree.


Letter Tree
*Write letters (or use letter stickers) to make a "chicka chicka boom boom boom" tree.


Word Family Tree
Have children choose a rime and then write all the words they can think of that end with that sound.
*This would be a great partner project.


Word Tree
Children can write sight words, vocabulary words or spelling words on their tree branches.
*Wouldn't this be a more fun way to have children practice writing and reading words than with a worksheet?

Numbers Bonds
Children can choose a number and then write different ways to make the number on the branches.

Family Tree
*Let children make a family tree by writing names of family members on their tree.

Spooky Old Tree
Twist the strips of paper as shown to make a spooky tree.  Let children cut bats, cats, and other spooky things to go on their tree.


*Use these trees to prompt descriptive writing or poems.


Fall Centerpiece

If you're entertaining this fall here's a centerpiece will get rave reviews.  All you need is a large paper grocery sack.  Wad and crush the sack until it is soft and pliable.  Next, make a large tree using the same process you did with the lunch bag.  Use fake leaves, small pumpkins, and other seasonal objects to decorate your tree.  Taaa daaa!!

Tuesday, September 24, 2019

LEAF LABS

LIVE AT FIVE ON FACEBOOK TOMORROW 9/25
Can't wait to share some fun ideas with you!!!

Take advantage of the science lab on your playground with these leaf activities.


Leaf Hunt
Give each child a lunch sack and let them collect 2 or 3 leaves from the ground. Bring these back in the classroom and sort by shape, color, etc. You could also graph the leaves by shape. (Whenever you collect items outside emphasize the importance of taking things from the ground. Return the objects to where you found them after exploring with them in the classroom.)

Science Center
Let children investigate leaves in the science center with a magnifying glass or microscope. Ask children to draw the enlarged leaf.


Hint! You can also take a photo of a leaf with your phone and enlarge it to show the veins and details.

Research
Check out a leaf identification book from the library. Can children match up their leaves with those in the book to identify which tree they came from?

Leaf Rubbings
Lay a sheet of paper on top of a leaf. Remove the paper from an old crayon and rub the side over the leaf to make a print.Hint! Use rubber cement to glue the leaf to the table. It will be easier for the children to make a rubbing, and you can just rub off the rubber cement after the activity.
Leaf Book
Let each child find a "favorite" leaf. To preserve, place the leaf in a sheet of newspaper and put a book on top overnight. Place the leaf in a zip baggie. Encourage children to dictate or write a sentence about their leaf.
                                                         
*Put several baggies together to make a book.

I Wonder Why?
Brainstorm why leaves turn colors and fall off trees in the fall. Have children go home and do a little research with their parents and report results in class the following day.

Deciduous Trees (Sandra Kelley)
Tune: "Do Your Ears Hang Low?"
Do your leaves fall down?
Do they tumble to the ground?
Do you lose your leaves in the fall?
Then you are deciduous that we know
because in the fall your leaves all go!

*What's the difference between deciduous trees and evergreen trees? Take a nature walk and ask children to identify both types of trees.

Monday, September 23, 2019

FALL Y'ALL!

Happy First Day of Autumn!  Football, pumpkins, colorful leaves, and FUN are in the air!  
  

Leaves Are Falling
(Tune: “Where Is Thumbkin?”)
Leaves are falling (Echo song. Children repeat each line.)
Leaves are falling (Flutter fingers down.)
To the ground. (Touch the ground.)
To the ground.
Red, orange, and yellow (Flutter fingers.)
Red, orange, and yellow
Falling down. (Touch the ground.)
Falling down.

*Let children dramatize being leaves and dancing in the wind. As the song ends they fall quietly to the ground.

*What happens to leaves after they fall from the trees? Later in the fall when there are lots of leaves on the ground demonstrate how to pick up a handful of leaves and crumple them in your hands. Explain how those leaves will decay and turn into soil.

Fall
Why do you think they call this season “fall”? What’s another name for fall?
What season comes before fall? What season comes after fall? Fall is a cool off time between hot summer and cold winter.

Signs of Fall
Brainstorm signs of fall and write them on the board. What kind of clothes do we wear in fall? What’s the weather like in the fall? Are there any special seasonal foods we eat? What kind of sports are popular in fall? What holidays do we celebrate in the fall? What do animals do to get ready for winter? What do plants do in the fall?

*Let children make an attribute web and label it with pictures or words of things that remind them of fall. Older children can do this as a writing assignment, but for younger children this can be an opportunity for the teacher to model writing and develop vocabulary.


Nature Walk
Go on a nature walk and look for signs of fall. Provide children with tablets, paper, and pencils so they can record their “observations” on the walk.

I LIKE AUTUMN Language Experience Chart
Let children dictate sentences about why they like autumn. Older children could write their own original stories about, “Fall, Fall, Best of All!”

Acrostic Poem
Write the words “fall” or “autumn” vertically down the side of a sheet of paper. Children think of a word that starts with each letter that relates to fall. 


Sunday, September 22, 2019

FIDGET RELAXERS

Finger exercises are a great way to calm children, focus their attention, and develop hand strength, coordination, and their brains!

Twiddle Your Thumbs
Demonstrate how to fold your hands and twiddle (rotate thumbs around each other) your thumbs.


*Unfold your hands and put the opposite thumb on top and twiddle.

Tap Them
Put palms together and tap one finger at a time starting with thumbs.


Spider
Open hands and touch fingertips. Bend in and out. Tap thumbs. Then tap index fingers, middle fingers, ring, and pinky fingers. Reverse.

*Roll each leg/finger forward and then backwards.

https://www.youtube.com/watch?v=sB4lXUhRfMU


Balancing Act
Directions: Have children stand and follow along as they balance and increase mindfulness.

Feet together, close your eyes, (Close eyes breath in and out.)
And breath slowly in and out.
Open your eyes, (Balance on left foot.)
Lift your right foot and balance on the left.
Put your arms out straight. (Arms out wide as you balance.)
Now reach for the stars. (Arms up in the air as you balance.)
Place your right foot on the floor
And raise your left foot. (Balance on right foot.)...

Now close your eyes and slowly breath in and out.
Let your mind take you to a happy place.

           
           https://www.youtube.com/watch?v=Thq9MTAUfSY


Tony Chestnut
Directions: Point to the body parts as you sing. Sing each verse softer until you are doing the silent version.

Toe (Point to toes.)
Knee (Point to knee.)
Chest (Point to chest.)
Nut (Point to head.)
Nose (Point to nose.)
Eye (Point to eyes.)
Love (Cross arms over chest.)
You (Point to a friend.
Toe Knee Nose (Continue to point to body parts.)
Toe Knee Nose
Toe Knee Chest Nut
Nose Eye Love You
That’s what Toe Knee Nose.

                                                      
                                                     https://www.youtube.com/watch?v=fHUYa8oZVVs


http://www.drjean.org/html/songs/Fidgets-index.php


Saturday, September 21, 2019

FIDGET WIGGLE BREAKS

Someone once said that the mind can only comprehend what the seat can endure. Those of you who work with children clearly understand that if the children sit too long they will turn you off!! These activities can be done in a limited space with no special equipment or clothing. You’ll be surprised how having children move for a few minutes can reduce fidgets, energize their brains, and increase learning!

Hint! Before doing these activities ask children to show you their “body space” by extending their arms slightly and twisting around. Remind them to stay in their body space as you do these activities.

Wiggle Willy
Directions: Have children stand and tell them that you have a song about a little boy who has the fidgets just like them sometimes. His name is Wiggle Willy!

I know a little boy. (Dance from side to side to the beat.)
His name is Wiggle Willy.
He is so very nice, but oh, he is so wiggly!
And so go his fingers and his fingers go like so
And his fingers are always soooooo… (Wiggle fingers.)
And so go his arms…(Wiggle arms and fingers.)
Legs…(Wiggle legs, arms, and fingers.)
Head…(Wiggle head, legs, arms, and fingers.)
Tongue…(Move tongue back and forth along with the other body parts.)
Wiggle Willy!
                               https://www.youtube.com/watch?v=g_kbXUbqBYU


Jumping Brains
Directions: Ask children to stand and challenge them to jump in their space as long as they can. When they get tired they can sit back in their seats.

Hint! Have children look at the second hand on the clock to see how long they can jump. Record the seconds. Each day practice “jumping” and have them record how their time improves.
                                                              
                                                https://www.youtube.com/watch?v=6Y1UBTOFEzA


FIDGET SITTER BREAK
Children can release wiggles even in a chair.

My Bonnie Bounce
Directions: Sing the song called “My Bonnie Lies over the Ocean.” Every time you come to a word that starts with the /b/ sound stand up or sit down.

My Bonnie (Stand up.)
Lies over the ocean.
My Bonnie (Sit down.)
Lies over the sea.
My Bonnie (Stand up.)
Lies over the ocean.
Oh, bring (Sit down.)
Back (Stand up.)
My Bonnie (Sit down.)
To me.
Bring (Stand up.)
Back (Sit down.)
Bring (Stand up.)
Back (Sit down.)
Oh, bring (Stand up.)
Back (Sit down.)
My Bonnie (Stand up.)
To me, to me.
Bring (Sit down.)
Back (Stand up.)
Bring (Sit down.)
Back (Stand up.)
Oh, bring (Sit down.)
Back (Stand up.)
My Bonnie to me. (Sit down.)
                             
                          https://www.youtube.com/watch?v=0ONWTT-JFu8


Going Crazy!
Directions: Don’t go crazy! Try doing this exercise with your students instead.

I am slowly going crazy, (Cross right ankle on left knee. Place right
elbow on right knee and place chin on palm.)
1, 2, 3, 4, 5, 6, switch. (Cross left ankle on right knee and place
chin on left palm.)
Crazy going slowly am I, 6, 5, 4, 3, 2, 1, switch.

           
          https://www.youtube.com/watch?v=BgDU5RpzUms


http://www.drjean.org/html/songs/Fidgets-index.php