a. Follow words from left to right, top to
bottom, and page by page.
Magic Fingers
– Have children hold up their pointer and explain that it is their “magic
finger” to help them read. Put a
little spritz (magic lotion) on their finger. Use the finger to touch the front of the book and the back
of the book. Touch the top of the
page and the bottom of the page.
Sweep your magic finger under each line from left to right.
When You Read
You Start at the Top – Children can sing this song to the tune of “London
Bridge” as they practice the movements:
When
you read you start at the top,
Start
at the top,
Start
at the top.
When
you read you start at the top
And
go to the bottom of the page.
When
you read go left to right,
Left
to right,
Left
to right.
When
you read go left to right
And
then go to the next line.
Finger Pointer
– Glue a fake fingernail to a craft stick. What an engaging way for children to track print from top to
bottom and left to right!
Yummy Pointers
– Give children Bugles to put on their fingers to practice following a line of
print. They can eat them when they
are finished.
*Pretzel sticks
also make edible pointers.
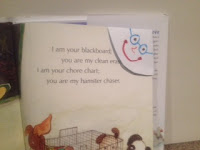
Envelope
Bookmark – Cut a diagonal corner off an envelope. (One envelope will make 4 of these.) Let children decorate these with
markers. Practice reading books
and putting the bookmark on the upper corner to “save your place.”
Simon Says
– Each child will need a book to play this variation of “Simon Says.”
Simon
Says show me the front of the book.
Simon
Says show me the back of your book.
Simon
Says show me the first page in your book.
Simon
Says show me the last page in your book…
Long Story
– Stack four or five sheets of paper on top of each other and staple 4 times
down the left side as shown. Cut
horizontally across to make 4 “long” books. Put a green dot on the left side by the staple. Children can make designs, write
letters, write numerals, etc. starting at the green dot and going across the
page.


