photo 3am_dj_home_zps919fb85e.png photo 3am_dj_about_zps7cce4c75.png photo 3am_dj_website_zps73051235.png photo 3am_dj_ss_zps6759ec2a.png photo 3am_dj_bs_zps43e27832.png

Friday, November 30, 2012

THE GIVING BOOK

Mercy me!  What to do with all those advertisements and catalogs!  Here’s an idea you will love!  And, it might encourage children to think about others rather than themselves.

Encourage your students discuss why they like to give gifts to others.  How does it make them feel when they do something special for someone they love?  Explain that they will each get to make a book of things they would like to GIVE to others.  You can use construction paper or cut wrapping paper into 8 ½” x 11” pieces.  Lay two sheets of white paper on top of a piece of wrapping paper.  Fold in half and staple.  Provide children with catalogs and store advertisements.  Let them cut out objects they would like to give others and glue them in their “Giving Books.”  Encourage them to label the presents with the recipient’s name.
Adaptation:  Use a gift bag to make a giving book.  Cut the front and back off the bag.  Cut paper the size of the bag and give a sheet to each child.  After children draw or cut out pictures of presents they would like to give, staple their pictures in between the front and back of the bag to make a class book.

CHOIR OF ANGELS
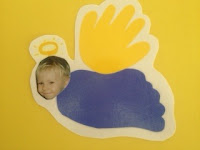
Here's one more idea I had to share with you in case you need a quick costume for a school program.  Cut the rim off a paper plate.  Attach a red construction paper bow.  Cut a slit so it can open and be placed around the neck.  Now, tell your students to shine their halos!  (Use palm to make a circular motion over your head.)


Thursday, November 29, 2012

FREE GIFT WRAP


Wrapping Paper – With tissue paper, paper plates, paint, and cookie cutters you’ll be all set to create your own wrapping paper.  First, fold a paper towel and place it on a paper plate.  Pour paint on the paper towel.  Let children dip the cookie cutters in the paint and print on the tissue paper.
*Recycle paper grocery sacks to use as wrapping paper.
*Let children paint with pine boughs on newspaper to create wrapping paper.
*Use fruits or vegetable prints to create one of a kind wrapping paper.

Gift Tags – You’ll need card stock, an ink pad, fine tip markers, and ribbon to make these gift cards.  Cut cardstock into 2” x 5” rectangles.  Fold in half.  Children press their thumb on the ink pad and then print on the front of the card.   Let them add details with markers.  Punch a hole and tie on a ribbon.
Greeting Cards  - Let children use fingerprints or handprints to make “one of a kind” holiday cards.  They can also make a colorful collage by gluing bits of
wrapping paper to a blank card.


Wednesday, November 28, 2012

MADE ESPECIALLY FOR YOU!


Didn’t see anything you liked yesterday?  Well, here are a few more gifts to choose from.
                 
PICTURE FRAME
Materials:  cardboard, puzzle pieces, glue, photograph
Directions:  Cut cardboard into 4” x 8” picture frames.  Let children glue puzzle pieces around the edges.  Tape a photo to the back.
Adaptations:  Add a magnetic strip to the back so it can be hung on the refrigerator.
Decorate with buttons for mom and say “Cute as a button!”
Decorate with golf tees for dad.
Stack colored craft sticks to make a frame.
RECIPE BOOK
Materials:  copy paper, construction paper, crayons, stapler
Directions:         Ask each child to bring a copy of a favorite family recipe from home.  (You could ask parents to send in a recipe for a special dish from their culture, a healthy snack food, a “kid friendly” dish, etc.)   Have each child decorate his page with a black pen.  Run off copies for each child, and then put them in a construction paper cover to make a recipe book.
Adaptation:  You could also let each child dictate how to make the recipe her parents have sent in.  Put her version at the bottom of the page.
GOLDEN SHOE
Materials:         old shoes, gallon of school glue, old paint brush, gold spray paint
Directions:  Ask each child to bring in one old shoe.  Pour the school glue in a disposable container, and then let them paint the glue all over their shoe.  (Inside, outside, all over!)  Dry for several days on wax paper.  Have children paint glue all over their shoe a second time.  Dry.  Spray paint gold or silver.
Adaptations:  Stick a sprig of holly in the shoe or add this poem: 
Here is my little shoe. 
I made it just for you. 
When I’m grown and tall,
you can remember me small.

BOOKMARK
Materials:  burlap, felt scraps, glue
Directions:  Cut burlap into 8” x 3” strips.  Let children unravel ½” from all four sides.  Cut flowers or other shapes from felt and glue on the burlap.
Adaptation:  Children could also use plastic needles to sew yarn designs on burlap bookmarks.

LUGGAGE TAG
Materials:  pipe cleaners, letter beads
Directions:  Let children string beads on a pipe cleaner.  (They can do initials, names, or a pattern.)  Twist the ends and you’ll have a perfect bag tag.
NOTE CARDS
Materials:  cardstock, black felt tip pen
Directions:  Cut an 8 ½ x 11” piece of paper in half.  Fold in half and ask child to draw a picture of her family with a felt tip pen on the front.  Open and place two pictures at a time on the copy machine.  Make 5-10 copies on cardstock.  Cut apart, fold, and tie with a decorative ribbon.         
         
ORNAMENTS
Materials:          1 cup flour, 1 cup salt, ½ cup water, ornament hangars
Directions:         Mix all the ingredients together to make the dough.  Let the children mold the dough or flatten so it is ½” thick and cut with cookie cutters.  (Use a straw to punch a hole for a hangar.)  Let the dough dry for a day.  Turn the dough over and dry another day.  Paint with tempera paint and spray with shellac.
Adaptation:           Dissolve 2 Tb. instant coffee in ½ cup hot water and add to the flour and salt.  Your ornaments will look like gingerbread cookies.
Hint!          Shorten drying time by baking in a 250° oven for 5-10 minutes.

SOCK SNOWMAN
Materials:         white tube socks, fiber fill, rubber bands, markers, felt scraps, wiggly eyes, and other craft accessories
Directions:  Have children fill the bottom of the sock with 3 large fists of fiberfill.  Put a rubber band around this section.  Put two fists full of fiberfill in and then put a rubber band around the middle section.  Put one fist full of fiberfill in to make the head and put a rubber band.  Pull the top cuff of the sock over the head to look like a hat.  Decorate with wiggly eyes, felt scarf, yarn hair, etc.  Draw on a mouth and buttons with markers.

Tuesday, November 27, 2012

GIFTS FROM THE HAND


Your holiday dilemma is solved!  Here are inexpensive, simple, and easy gifts your students can make.  You’ll save money as you nurture the true spirit of giving in children.  Best of all, these projects will be treasured because they are one of a kind!  They are made by the gifted hand of a child!

It’s important to be sensitive to different beliefs children may have this time of year.  Gifts don’t have to be for Christmas or Hanukkah ~ you can give someone a gift anytime just because you care about them! 

Hint!  Make sure that children DO these projects themselves!  They need to reflect the children’s individuality and efforts. 


PENCIL CAN
Materials:         juice or vegetable can, glue, pasta, spray paint
Directions:         Remove the label from the can.  Let children glue pasta (bow ties, spirals, macaroni, etc.) around the can.  Spray paint gold or silver.
Adaptation:  Children can also cover a can with construction paper.  Next, let them create a collage on the can with pictures and words cut from magazines.
KEY RACK
Materials:         wood scraps (4” x 10”), nails, markers, picture hangers
Directions:         Let children decorate the wood with markers.  Next, let them hammer 4 nails spaced evenly apart.  Attach a hanger to the back.
Adaptation:  Children could also paint wood scraps.

SCARF HOLDER
This is similar to the key rack except children attach plastic hooks to hold scarves, belts, or ties.
COUPON BOOK
Materials:         paper, markers, pens, construction paper, ribbon
Directions:         Each child will need 3 sheets of paper.  Cut the paper into fourths to make 12 pages.  On each page, children write (or dictate) a different job they could do for their parents, such as set the table, give a back rub, clean their room, etc.  Make a cover from construction paper.  Hole punch in the upper left hand corner and tie with a ribbon.
              

PET ROCK
Materials:          rocks or stones (about the size of a fist), markers, felt, wiggly eyes, 
                         yarn, glue
Directions:         Go on a rock hunt and let each child find a special rock.  Have children wash their rocks and set them aside to dry.  Decorate the rocks with wiggly eyes, markers, yarn hair, etc.  Add a piece of felt to the bottom to make a paper weight.
Adaptation:         Let children name their rocks and write stories about how to care for them.
NAPKIN RINGS
Materials:  paper towel rolls, stickers, yarn, lace, fabric, buttons
Directions:  Cut the cardboard roll into 1 ½” sections.  Decorate with stickers, yarn, fabric, lace, etc. 
Adaptation:  Insert holiday napkins.

Monday, November 26, 2012

A TASTE OF THE SEASON

Snowman Soup – You’ll need instant hot chocolate with miniature marshmallows, zip sandwich bags, wrapped candy canes, and red ribbon to make this treat.  Put the package of the instant hot chocolate in the zip bag.  Tie on a candy cane with these directions:
         Here’s a little snowman soup –
         Complete with stirring stick. 
         Add hot water, sip it slow.
         It’ll warm you up real quick!”
Hint!  This would be a great gift for school helpers and volunteers.

Wreath Sandwich - You will need bagels, cream cheese, green food coloring, and fruit loops to make this snack. First, dye the cream cheese green. Spread it on the bagel and add red fruit loops for berries.
Menorah Snack - Children will need a small banana, pretzel sticks, and a piece of red licorice to make this menorah. Peel the banana and insert a piece of red licorice in the middle. Insert 4 pretzel sticks (candles) on either side.
Reindeer Sandwich – You will need bread, peanut butter, pretzel twists, raisins, and a red M & M to make this yummy sandwich.  Cut the bread into two triangles.  Spread peanut butter on the bread and then decorate with raisin eyes and a red candy nose.  Break pretzels in half and add for antlers.
Note!  If children have peanut allergies spread with cream cheese or another topping.

Sunday, November 25, 2012

HOLIDAY HANDS


Do you know what today is?  Yep!  It’s November 25th and that means Christmas is just a month away.  Over the next week I’ll post art projects, gifts children can make, recipes, and lots of FUN ideas.  Although you probably haven’t finished your turkey leftovers, I know you need ideas sooner rather than later so you can collect materials and integrate these ideas into your lesson plans. 

Note!  Some of you might not do holidays in your schools, so feel free to adapt these projects. 

How about using children’s hands to make wrapping paper, cards, or decorations.  You can trace around their hands and cut them out, or let children dip their hands in paint and print.  You could also use fabric paint and make holiday shirts with their handprints.


Saturday, November 24, 2012

SING ALONG WITH ME!


I hope each of you had a glorious Thanksgiving!  Were you in the crowd that stayed up until midnight to get those bargains?  Some people play tennis.  Some people run races.  Some people enjoy the thrill of getting a good deal! 

My husband and I were on our way to our son’s for Thanksgiving and I started singing, “Here we go…”  He finished by singing, “Up a row to a birthday party.”  Then we both sang, “Dolly dear, sandman’s near.  We will soon be sleeping.”  Now this won’t mean a thing to most of you, but anyone who took piano lessons in the 50’s or 60’s probably started with a book called “Teaching Little Fingers to Play.”  The first songs we learned were “Here we go…” and “Dolly dear…”  My husband and I have a hard time remembering our names some days (just kidding!), but isn’t it interesting that music we learned over 55 years ago is still alive inside our heads?  That’s why singing is such a magical way for children to learn. 

We’re having a neighborhood party this week and the theme is “Leave It to Beaver.”  We’re having “retro” foods from the 50’s and 60’s (congealed salad,  meatloaf, mac and cheese, pudding, etc.) and I’ve ordered a “Sing along with Mitch” DVD for entertainment.  Oh, what fun we used to having sitting around and singing with Mitch as the little ball bounced over the words!  Talk about fluency fun! 

But nobody sings any more, and that’s a sad thing because these children need a song in their hearts!  So to start off the holiday season, here are a few songs to share this coming month.  And although your students might forget 90% of what you teach them, I bet these songs will stay in their brains a long time!

Jingle Bells
Chorus:
Jingle bells, jingle bells,                     (Pretend to hold bells and shake.)
Jingle all the way.
Oh, what fun it is to ride
In a one horse open sleigh.  Hey!        (Fist in the air.)
Jingle bells, jingle bells,                     (Pretend to jingle bells.)
Jingle all the way.
What fun it is to ride and sing
In a one horse open sleigh.

Dashing through the snow,                  (Pretend to hold reins and drive
In a one horse open sleigh                  sleigh.)
Over the fields we go,
Laughing all the way.                           (Hand on stomach and laugh.)
Bells on bobtail ring,                           (Pretend to drive sleigh.)
Making spirits bright.
What fun it is to ride and sing
A sleighing song tonight.  (Chorus)
Here’s a book to go with the song:

Sleigh Riding – Have children sit on the floor facing the same directions.  Demonstrate how to hold the person’s waist in front of you.  As you sing the song sway forwards and backwards to the beat as if riding a sleigh.

Jingle Bells – Let children thread several jingle bells on a pipe cleaner.  Twist the ends together to make a bracelet children can shake as you sing.

Jingle Bell Painting - You will need an empty cheese ball container or similar cylinder shape with a lid.  Cut a piece of paper so you can roll it and put it in the cylinder.  Take two jingle bells.  Drop one in red paint and the other in green paint.  Use a spoon to transfer the bells to the can.  Put on the lid, then shake up the can as you sing “Jingle Bells.”  Take out the paper and you’ll have a jingle bell painting!
S A N T A
(Tune:  “BINGO”)
There is a jolly bearded man          (Put arms out in front of you
And Santa is his name-o.                like Santa’s tummy.)
S – A – N – T – A,
S – A – N – T – A,
S – A – N – T – A,
And Santa is his name-o.

He lives at the North Pole…             (Clap instead of saying “S.”)
His wears a suit all red and white…   (Clap for “S” and “A.”)
He makes toys for girls and boys…    (Clap for “S,” “A,” “N.”)
He drives a sleigh with 8 reindeer…  (Clap for “S,” “A,” “N,” “T.”)
He’ll visit you on Christmas Eve…       (Clap for all letters.)
Here’s the link so you can download this book:
www.drjean.org/html/monthly_act/act_2007/12_Dec/pg00.html

S–A-N-T-A  - Write a different letter on five sheets of paper.  Draw a hand on the back of each sheet. Choose five children to hold these as you sing the song.  Explain that as you sing the song, when you turn over the letter and see the hand they should clap.
Santa Star – Give children red stars and a few cotton balls.  Can they make a Santa out of the star?  Add their name, date, and a piece of yarn for a hanger.  This makes a great ornament for them to take home and hang on their tree.

My Dreidel
(Traditional Tune)
I have a little dreidel,                  (Pretend to hold out palm with a dreidel.)
I made it out of clay;
And when it’s dry and ready,
Then dreidel I shall play.
Oh, dreidel, dreidel, dreidel,         (Clap as you dance in a circle like a top.)
I made it out of clay.
Oh, dreidel, dreidel, dreidel,
Now dreidel we shall play.

My dreidel is so playful,                (Pretend to hold dreidel in palm)
It loves to dance and spin;
A happy game of dreidel,
Come play, now let’s begin.
Oh, dreidel, dreidel, dreidel,         (Clap and twirl around.)
Come play now, let’s begin!
And when it gets all tired
It drops and then I win.               (Fall gently to the floor.)
www.drjean.org/html/monthly_act/act_2007/12_Dec/1booksDec/MyDreidel.pdf

What songs do you remember?  “Up on the Housetop,” “Rudolph the Red Nosed Reindeer,” “Frosty the Snowman”?  Keep those memories alive by singing with your students over the next few weeks.  It might also relieve some stress! 

Thursday, November 22, 2012

THANK YOU FOR THE WORLD SO SWEET!


I’m thankful for YOU and all the children you teach!
 Velvet Adrian’s Kindergarten in Derby, Kansas.  Aren’t they precious?

SAY THE BLESSING AND PASS THE DRESSING!

Tuesday, November 20, 2012

OPPOSITES


The opposite of hungry is full, which we will all be in a few days.  
The opposite of sad is happy, which I hope you will all be on Thursday.  
The opposite of stressed is relaxed, which is how you need to be.
The opposite of conflict is peace, which I wish all of you!  
The opposite of work is play...which I intend to do!  
See you Friday with some happy holiday ideas!

L.K.5
-Demonstrate understanding of frequently occurring verbs and adjectives by relating them to their opposites (antonyms).

Antonym Actions - Let children act out words that are opposite.  For example, if the teacher says “happy” the children make a “sad” face.  If the teacher says “front” the children turn around and show their back.

Opposite Book - Take pictures of children making opposite motions and put them together to make a class book.
Opposite Song
(Tune: “Shortnin’ Bread” – Totally Reading CD)
You can do opposites, opposites, opposites.
You say the opposite word after me.
Hot            (Cold)            Big  (Little)
Near            (Far)            Fast  (Slow)
North (South)                 Loud  (Soft)
On  (Off)                         Tall  (Short)
Boy            (Girl)              Black  (White)
Laugh  (Cry)                  Good  (Bad)
Sweet      (Sour)             Wet  (Dry)
Full  (Empty)                   Beginning- and “The End.”

Backwards Day – Children will get a kick out of planning a “backwards day.”  Remind them to wear clothing inside out and work through your daily schedule from the bottom up.  Start with a good-bye song and end your day with the Pledge of Allegiance and a greeting.  At lunch eat your dessert first.  What else can the children suggest?

Flip Book – Fold a sheet of paper into eighths.  Open.  Cut down half way on each creased line as shown.  Children draw a picture on the front and the opposite underneath.


Monday, November 19, 2012

MY BOOK REPORT IS DUE!


Do you remember when Snow White was born how the good fairies came and gave her wishes?  What wish (other than looks and IQ) would you like to give children to help them be successful in school and life?  Characteristics such as self-esteem, motivation, persistence, adaptability, creativity, delayed gratification, and self-control all come to mind.  These are also part of the magical quality called “executive function.”  No wonder educators and researchers are so fascinated with the topic and how we can nurture it!

After searching the internet, I ordered EXECUTIVE FUNCTION IN THE CLASSROOM by Christopher Kaufman.  This is a very comprehensive, scholarly, and well-researched book.  It would be a fantastic resource for a book study or for a graduate course.  (Here’s the Cliff Notes version.)
The two key strands of the executive skills are the metacognitive strand and the social/emotional regulation strand.
Metacognitive Strand                                    Social/emotional Regulation
Goal setting                                                  impulse control
Planning strategies                                        emotional control
Sequencing                                                    adaptability
Organization of materials
Time management
Task initiation
Executive/goal-directed attention
Task persistence
Working memory
Set shifting

Clearly, children arrive in the classroom with varying personalities and skills.  However, teachers play a significant role in designing an environment that will support and nurture the executive function.  The strategies that Dr. Kaufman suggests are simple and reaffirm that good teaching is good teaching!  Further, the suggestions reflect what early childhood teachers have always done.  Demonstrating, modeling, providing children with practice, learning centers, role-playing, social groups – sound familiar?  We have always known that if children are engaged and interested, it is more likely that they will learn!

Here are some key points Kaufman recommends:
*Teach new skills and content systematically and explicitly.  Provide for small group and independent instruction.
*Teach strategies explicitly and demonstrate the manner in which they should be applied in real-life learning situations.
*Limit demands on working memory.  Go from simple to complex and concrete to abstract.
*Provide many opportunities for guided and extended practice.
*Keep things as predictable and consistent as possible.
*Anticipate situations that students might find frustrating and model strategies that can help them.

The specific strategies you will find in the book for reading, writing, and math are well-researched and support Core Standards and 21st Century Skills.  I’ve got quite a challenge to put this together for my January website which will focus on 21st Century Skills and the Executive Function.  Stay tuned for more on January 1st, 2013!