photo 3am_dj_home_zps919fb85e.png photo 3am_dj_about_zps7cce4c75.png photo 3am_dj_website_zps73051235.png photo 3am_dj_ss_zps6759ec2a.png photo 3am_dj_bs_zps43e27832.png
Showing posts with label Gifts. Show all posts

Thursday, December 11, 2025

IT'S A WRAP

Encourage the children to make their own gifts and then save some money and let them make their own wrapping paper and cards.


Wrapping Paper
With tissue paper, paper plates, paint, and cookie cutters you’ll be all set to create your own wrapping paper. First, fold a paper towel and place it on a paper plate. Pour paint on the paper towel. Let children dip the cookie cutters in the paint and print on the tissue paper.
*Recycle paper grocery sacks to use as wrapping paper.


*Let children paint with pine boughs on newspaper to create wrapping paper.


*Use fruits or vegetable prints to create one of a kind wrapping paper.


Gift Tags
You’ll need card stock, an ink pad, fine tip markers, and ribbon to make these gift cards. Cut cardstock into 2” x 5” rectangles. Fold in half. Children press their thumb on the ink pad and then print on the front of the card. Let them add details
with markers. Punch a hole and tie on a ribbon.

Greeting Cards
Let children use fingerprints or handprints to make “one of a kind” holiday cards. They can also make a colorful collage by gluing bits of wrapping paper to a blank card.

Sunday, December 7, 2025

GIFTS MADE BY KIDS

Here are some gifts that any child would be proud to make and give. Please remember to let the children DO the projects themselves. They need to reflect the children’s individuality and efforts.


PENCIL CAN
Materials: juice or vegetable can, glue, pasta, spray paint
Directions: Remove the label from the can. Let children glue pasta (bow ties, spirals, macaroni, etc.) around the can. Spray paint gold or silver.
Adaptation: Children can also cover a can with construction paper. Next, let them create a collage on the can with pictures and words cut from magazines.


KEY RACK
Materials: wood scraps (4” x 10”), markers or paints, picture hangers
Directions: Let children decorate the wood with markers. Attach picture hangers to hold the keys.


COUPON BOOK
Materials: paper, markers, pens, construction paper, ribbon
Directions: Each child will need 3 sheets of paper. Cut the paper into fourths to make 12 pages. On each page, children write (or dictate) a different job they could do for their parents, such as set the table, give a back rub, clean their room, etc. Make a cover from construction paper. Hole punch in the upper left hand corner and tie with a ribbon.


PICTURE FRAME
Materials: cardboard, puzzle pieces, glue, photograph
Directions: Cut cardboard into 4” x 8” picture frames. Let children glue puzzle pieces around the edges. Tape a photo to the back.
Adaptations: Add a magnetic strip to the back so it can be hung on the refrigerator.
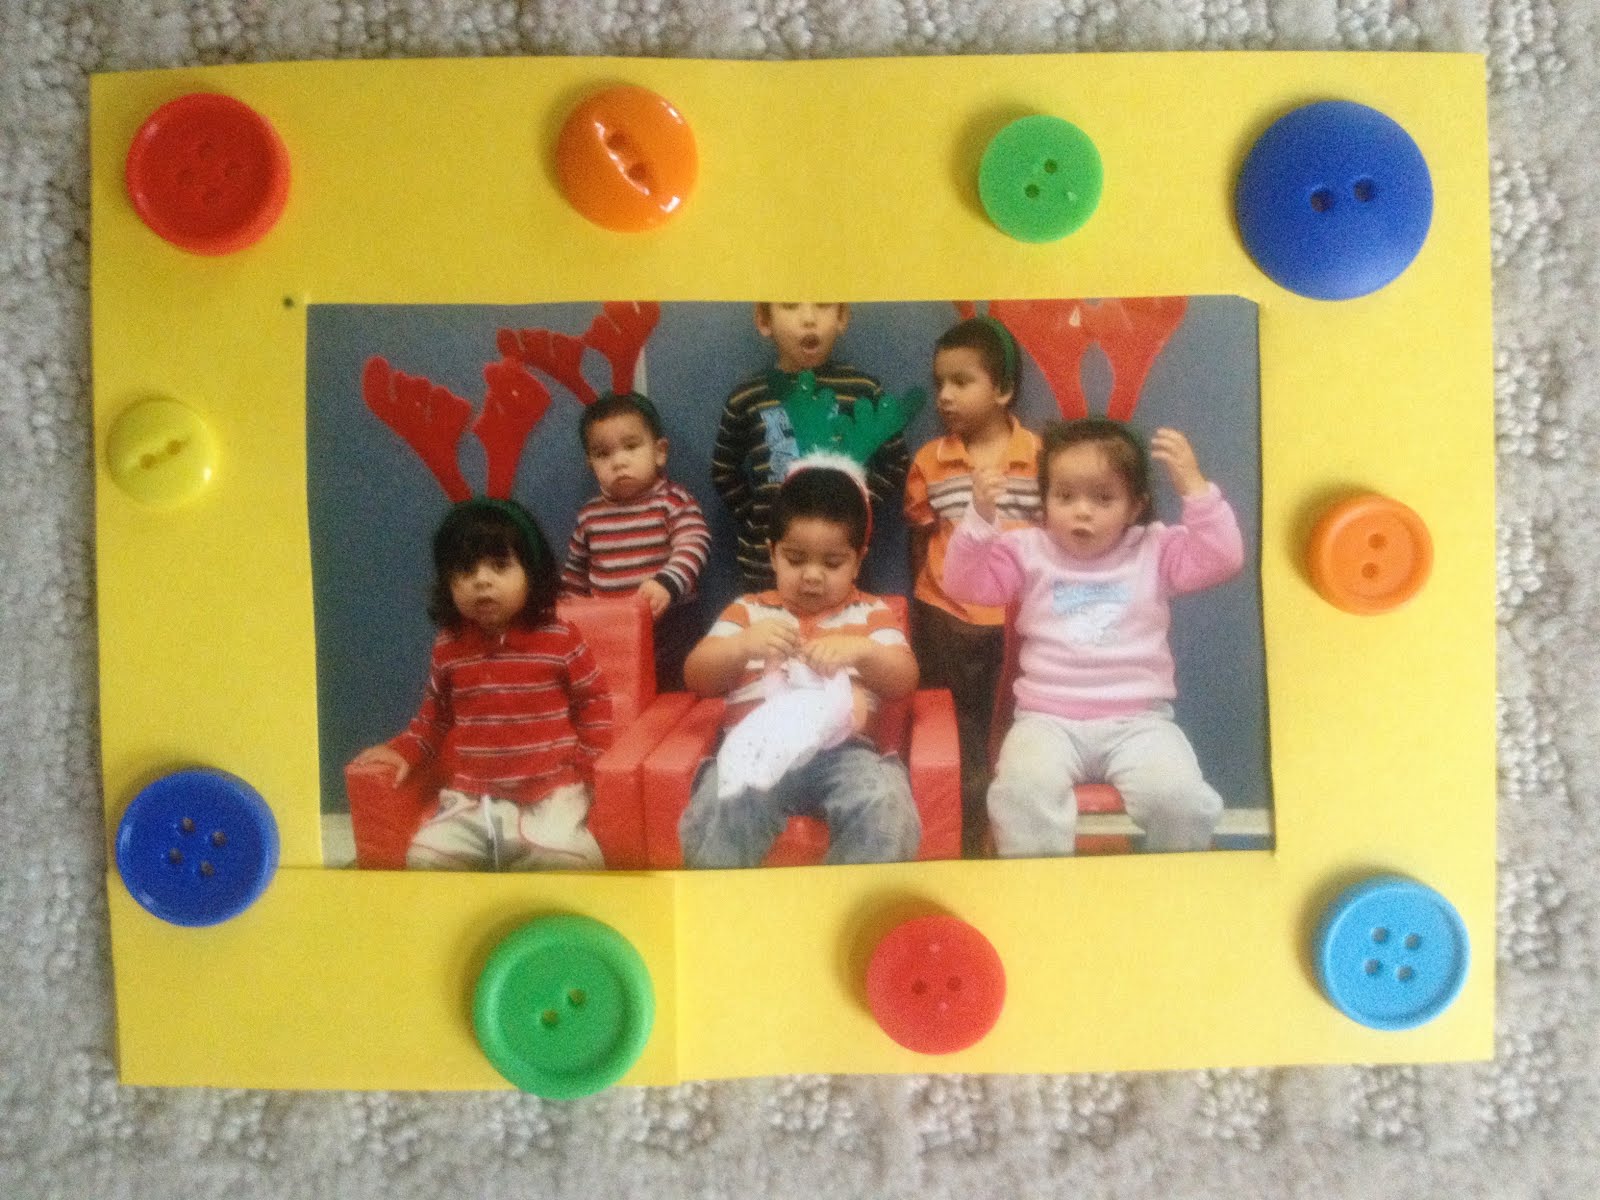
Decorate with buttons for mom and say “Cute as a button!”
Decorate with golf tees for dad.
Stack colored craft sticks to make a frame.


NOTE CARDS
Materials: cardstock, black felt tip pen
Directions: Cut an 8 ½ x 11” piece of paper in half. Fold in half and ask child to draw a picture of her family with a felt tip pen on the front. Open and place two pictures at a time on the copy machine. Make 5-10 copies on cardstock. Cut apart, fold, and tie with a decorative ribbon.

Friday, December 5, 2025

HOLIDAY COOKING FUN

Let's get cooking with some of these recipes! Even if you can't cook in your classroom, I bet parents would appreciate these ideas. How about your children or grandchildren, nieces or nephews???

Snowman Soup
You’ll need instant hot chocolate with miniature marshmallows, zip sandwich bags, wrapped candy canes, and red ribbon to make this treat. Put the package of the instant hot chocolate in the zip bag. Tie on a candy cane with these directions:

Here’s a little snowman soup –
Complete with stirring stick. 
Add hot water, sip it slow.
It’ll warm you up real quick!”


Hint! This would be a great gift for school helpers and volunteers.


Wreath Sandwich
You will need bagels, cream cheese, green food coloring, and fruit loops to make this snack. First, dye the cream cheese green. Spread it on the bagel and add red fruit loops for berries.


Menorah Snack
Children will need a small banana, pretzel sticks, and a piece of red licorice to make this menorah. Peel the banana and insert a piece of red licorice in the middle. Insert 4 pretzel sticks (candles) on either side.


Reindeer Sandwich
You will need bread, peanut butter, pretzel twists, raisins, and a red M & M to make this yummy sandwich. Cut the bread into two triangles. Spread peanut butter on the bread and then decorate with raisin eyes and a red candy nose. Break pretzels in half and add for antlers.


Note! If children have peanut allergies spread with cream cheese or another topping.


Reindeer Oats
Put a few tablespoons of butter in a flying pan. Add a few cups of Cheerios and stir over low heat. Sprinkle with salt.

*You can also sprinkle on cinnamon sugar for a sweet snack.

Sunday, September 21, 2025

NOTE THIS!

I found this idea for notecards from a "Mrs. Young" when I was cleaning out some old files. It might just be my age, but I do appreciate an old fashion paper "thank you" note, and I'm sure your parents and volunteers would as well. I also like this idea because it's very "child centered" and you don't need permission from parents to use their child's photo.

Directions: "Mrs. Young" asked each child to draw their picture with a black pen. She reduced the size and did a little cut and paste magic to get them on half a sheet of paper. On the other half it says, “Created especially for YOU by Mrs. Young’s Kindergarten Class of 20--.” Here's the open version as well as what it looks like folded into a card.


Hint! These could be run off on card stock, seasonal colors, or plain white paper.


Writing Center Stationery
Here's another idea that will encourage your students to write. Draw off 1 1/2" squares similar to the ones shown around the edge of a sheet of paper. Let the children draw their picture and write their name in one of the squares. Run off many, many copies so the children can use them to write notes to their friends.


Gift Cards
This is a great gift that children can make for their parents.
Materials: cardstock, black felt tip pen
Directions: Cut an 8 ½ x 11” piece of paper in half. Fold in half and ask child to draw a picture of her family with a felt tip pen on the front. Open and place two pictures at a time on the copy machine. Make 5-10 copies on cardstock. Cut apart, fold, and tie with a decorative ribbon.


Thank You for Helping Us Bloom and Grow
I loved this thank you note I received from some children. Their thumbprints are flowers and it says "Thank you for helping us bloom and grow." Something similar to this could also be used to make class stationery and notes.


Monday, February 3, 2025

LOVE GIFTS

Pointer
Children will be thrilled with a little heart pointer. Let them choose a sticker and attach it to the end of a craft stick. They can use it to read, identify letters, shapes, and so forth.


A Little Gift
This is a simple Valentine gift that parents will treasure. Let children wrap a small box or a piece of Styrofoam with wrapping paper and a ribbon. (It would be extra special if the children designed their own wrapping paper.) Add this note:


Here is a little gift
That you can never see.
The reason it’s so special,
It’s just for you from me.
Whenever you are lonely,
Or even feeling blue,
You only have to hold this box
And know I think of you.
Please never unwrap it,
And leave the ribbon tied.
Just hold the box close to your heart,
It’s filled with love inside.


Mouse Bookmark

Cut a heart about the size of a child’s hand from red construction paper. Fold in half. Open. Tape a 6” piece of string in the middle. Glue closed. Draw a nose, whiskers, and ears on the heart as shown to make it look like a mouse. Use for a bookmark.


Valentine for Parents 
Let each child take off one shoe and trace around her foot on white paper. Cut it out. Give each child 5 small pieces of red tissue paper to wad up and glue at the end of each toe for toenails. Write “I love you from my head down to my toes” on the foot.


*You can also make thumbprint cards or handprint cards for parents.


Check out my video to watch me demonstrate activities for February:
https://youtu.be/U-xYM_vp-N0

Tuesday, December 10, 2024

FREE GIFT CARDS

I've got a great gift idea that you can give your students this year. Best of all, it's FREE!!

Look at the list below and choose five or ten that you think your students would enjoy. Run them off and make a "2025 Gift Card Book." Pass them out the last day before vacation and you'll have children smiling and "planning and plotting" how they are going to use their gift cards when they return to school in 2025.


*Adapt these to the age and interest of your students. A four year old might be thrilled to choose the book for story time, but a first grader might prefer being excused from a written assignment.

Chew sugar free gum.

Use the teacher’s stamps, pens, or markers.

15 minutes of free time.

Help the teacher do a special job.

Decorate the bulletin board or door.

Sit at the teacher’s desk.

Take off your shoes.

Listen to an IPod or headset while you work.

Take a class game or book home for the night.

Choose a song and lead the class.

Eat lunch with your teacher or a special friend.

Be excused from a homework assignment.

Choose an indoor game to play.

Select the book for story time.

Sit by a favorite person all day.

Choose a board game and play it with a friend.

Hand out supplies.

Be leader of a class game.

Be excused from a written assignment.

Play games on the computer for 10 minutes.

Visit another class in the school.

Work with a friend.

Be first in line for lunch

Be a helper in the office, lunchroom, or in another classroom.

Read a story to the principal or another class.

Have the teacher call your parents to tell them what a great kid you are!

Take a note to the principal about what a great kid you are.

Make something at the art center.

Have your work displayed in the hall or on the classroom door.

One special wish!

Sunday, December 8, 2024

WRAP IT UP!

Now that the children have made their own gifts, save some money and let them make their own wrapping paper and cards.

Wrapping Paper
With tissue paper, paper plates, paint, and cookie cutters you’ll be all set to create your own wrapping paper. First, fold a paper towel and place it on a paper plate. Pour paint on the paper towel. Let children dip the cookie cutters in the paint and print on the tissue paper.


*Recycle paper grocery sacks to use as wrapping paper.


*Let children paint with pine boughs on newspaper to create wrapping paper.


*Use fruits or vegetable prints to create one of a kind wrapping paper.


Gift Tags 
You’ll need card stock, an ink pad, fine tip markers, and ribbon to make these gift cards.  Cut cardstock into 2” x 5” rectangles.  Fold in half.  Children press their thumb on the ink pad and then print on the front of the card.   Let them add details 
with markers.  Punch a hole and tie on a ribbon.


Greeting Cards 
Let children use fingerprints or handprints to make “one of a kind” holiday cards.  They can also make a colorful collage by gluing bits of wrapping paper to a blank card.

Saturday, December 7, 2024

HANDMADE BY A CHILD

Looking for some inexpensive gifts your students or personal children can make? Here are some gifts that any child will be proud to make and give. Just remember to let the children DO the projects themselves. They need to reflect the children’s individuality and efforts.


PENCIL CAN
Materials: juice or vegetable can, glue, pasta, spray paint
Directions: Remove the label from the can. Let children glue pasta (bow ties, spirals, macaroni, etc.) around the can. Spray paint gold or silver.
Adaptation: Children can also cover a can with construction paper. Next, let them create a collage on the can with pictures and words cut from magazines.


KEY RACK
Materials: wood scraps (4” x 10”), markers or paints, picture hangers
Directions: Let children decorate the wood with markers. Attach picture hangers to hold the keys.


COUPON BOOK
Materials: paper, markers, pens, construction paper, ribbon
Directions: Each child will need 3 sheets of paper. Cut the paper into fourths to make 12 pages. On each page, children write (or dictate) a different job they could do for their parents, such as set the table, give a back rub, clean their room, etc. Make a cover from construction paper. Hole punch in the upper left hand corner and tie with a ribbon.


PICTURE FRAME
Materials: cardboard, puzzle pieces, glue, photograph
Directions: Cut cardboard into 4” x 8” picture frames. Let children glue puzzle pieces around the edges. Tape a photo to the back.
Adaptations: Add a magnetic strip to the back so it can be hung on the refrigerator.
Decorate with buttons for mom and say “Cute as a button!”
Decorate with golf tees for dad.
Stack colored craft sticks to make a frame.


NOTE CARDS
Materials: cardstock, black felt tip pen
Directions: Cut an 8 ½ x 11” piece of paper in half. Fold in half and ask child to draw a picture of her family with a felt tip pen on the front. Open and place two pictures at a time on the copy machine. Make 5-10 copies on cardstock. Cut apart, fold, and tie with a decorative ribbon.


Wednesday, May 1, 2024

MOTHER'S DAY

Mother's Day is just around the corner on May 12th. I'm sure you'll find an idea just right for your special moms on my blog today.

A Box for Mommy (Tune: "Polly Wolly Doodle")
I wish I had a little box (Pretend to hold a box in your hands.)
To put my mommy in. (Pretend to put something in the box.)
I’d take her out and go (Take something out of the box
(kiss, kiss, kiss) and kiss in the air.)
And put her back again.

If my mommy were in my box
Were in my box, then she would always know.
School or play, night or day,
How I love her so! (Cross arms over chest.)

I made this box for mother’s day, (Pretend to hold a box.)
It’s full of love for you.
When we’re apart, hold it to your heart, (Put hands over heart.)
And know I’m thinking of you.


Box of Love Necklace
You can collect small boxes that jewelry come in or use matchboxes for this project. Spray paint the boxes and then let the children decorate them with stickers, glitter pens, etc. Glue a small picture of the child inside the box. Punch a hole and attach a ribbon so it can be worn around the neck. Teach children the song and let them present their necklaces at a Mother’s Day tea, or send the boxes home with the words to the song.


My Mom Can
Let each child make a predictable book about all the things their mom can do. 


Hats off for Moms

These are adorable hats from paper plates that children can make for their mothers. Cut the inner section out of the plate. Decorate the outer rim with markers. Cut 4” squares out of tissue paper and wad up and glue on the rim to look like flowers. Punch a hole in each side and tie on a 16” piece of string or ribbon. Place the hat on your head and tie under the chin.


LOVE YOU Flower
Trace around children's hands on construction paper and cut out. Glue to a stem and fold down the middle and ring finger to make sign language for "I love you!"


A Gift from the Heart
Make a flip book and write the following on the flips:
Some gifts are round.
Some gifts are tall.
Some gifts are large.
Some gifts are small.


Open and write:
But a gift from the heart is the best gift of all!


(Glue the child's photo or let them draw a picture of themselves.)
*Hint! Write "flip book" in my search engine to see how to make this book.


Handprints
Have children dip their hands in mud (or use paint) and press them on a sheet of paper. Let them decorate and then add this poem:
Here are my handprints made for you
this happy Mother's Day.
These are ones you can always keep
and not have to wash away!

Thursday, November 16, 2023

BUTTON DAY IS COMING

November 16 is Button Day…for real! Here are some thoughts on how to integrate buttons into your lesson plans any day. And, don't forget to read Eric Lintwin's PETE THE CAT AND HIS FOUR GROOVY BUTTONS!
Hint! I bought my bag of buttons at Walmart, but you could ask parents to send in extra buttons they don’t want for a learning activity. (That might be a good homework assignment.)

Math
*Have children count the number of buttons they have on. Who has the most? Who has zero? Tally how many in the entire class.

*Have children form groups with friends who have the same number of buttons.

*Use the buttons children bring in for math activities. Let them sort the buttons. What was their sorting rule? Can they sort them another way?


*Write numerals on cups and have children make appropriate sets in the cups using the buttons.


*Make patterns with buttons and use buttons for addition and subtraction.


Crafts
*Let children choose one button and glue it in the middle of a sheet of construction paper. Can they create a picture incorporating the button?

*Give children pipe cleaners or dental floss and let the string buttons to make necklaces and bracelets. (You’ll probably have to limit the number of buttons each child can use.)


*Make cardboard picture frames and let children glue on buttons. Insert their photo for a perfect gift for mom or dad.


Game
*Play “Button, Button, Who’s Got the Button?” This is really a silly game, but my kids loved it. Choose one child to be “it” and hide a button. Choose 3 or 4 other children to leave the classroom and stand in the hall. The rest of the students cup their hands together as if they are holding something. “It” walks around the room and places the button in one friend’s cupped hands. The children in the hall are then called back to the classroom and everyone chants, “Button, button, who’s got the button?” The students from the hall walk around opening hands until someone finds the button. They become the new “it” and the game continues.

*Let children make up their own game using buttons.

*Demonstrate how to sew on a button. Now, that’s a novel idea! I bet some of your kids have never seen someone use a needle and thread.