photo 3am_dj_home_zps919fb85e.png photo 3am_dj_about_zps7cce4c75.png photo 3am_dj_website_zps73051235.png photo 3am_dj_ss_zps6759ec2a.png photo 3am_dj_bs_zps43e27832.png

Friday, September 30, 2016

IF YOU'RE HAPPY...????

Well, sometimes you are happy, and sometimes you are not - and that's O.K.!! Helping children identify different feelings and deal with emotions in an acceptable way is part of the "hidden curriculum" that teachers deal with daily. Let's get started with a few new verses to a song everyone knows.

If You’re Happy and You Know It  (Traditional tune)
If you’re happy and you know it, clap your hands. 
(Clap twice.)
If you’re happy and you know it, clap your hands. 
(Clap twice.)
If you’re happy and you know it, 
Then your face will surely show it. (Smile.)
If you’re happy and you know it, clap your hands. 
(Clap twice.)

If you’re sad and you know it cry your eyes… (Rub eyes.)

If you’re mad and you know it stomp your feet… (Stomp feet.)

If you’re scared and you know it shiver and shake… 
(Wrap arms and shake.)

If you’re surprised and you know it say, “Oh, my!”… 
(Open eyes wide.)

*Let children suggest other emotions and movements.

*Discuss what causes different emotions and appropriate responses. What makes you happy? What can you do when you’re happy? What makes you stressed? What can you do when you’re stressed?

*Learn sign language for the different feelings and practice them as you sing the song.

Collaborative Books - Make class books such as “Things to Be Happy About,” “Things that Bug Us,” or “Scary Things.”

Connections with Characters - As you read books to the class, encourage students to describe how characters are feeling. Have they ever felt like that?

VocabularyExtend vocabulary by brainstorming different ways to say “happy,” “sad,” “angry,” “surprised,” etc. Draw expressions on paper plates and put them on a bulletin board. Write different synonyms for each emotion underneath.
                          
Dramatize - Let children pantomime different feelings as friends try and guess what they are.

Here are patterns for the expression puppets:                             
https://drive.google.com/file/d/0B1SnEagA4jljQjJ5S3F5TUl4aW8/view?usp=sharing

Role Play - Divide children into small groups and let them make their own expression puppets. Encourage them to role play different scenarios with their puppets.

Thursday, September 29, 2016

THE ALPHABET IN MY MOUTH

The Alphabet in My Mouth
(Tune: “He’s Got the Whole World in His Hands”)
I’ve got the whole alphabet in my mouth,
I’ve got the whole alphabet in my mouth.
I’ve got the whole alphabet in my mouth
and I can read!
I’ve got A - /a/ /a/ in my mouth
I’ve got B - /b/ /b/ in my mouth
I’ve got C - /c/ /c/ in my mouth
And I can read!
I’ve got D…Z
I’ve got all the sounds in my mouth and I’m ready to read!
     
Your children will LOVE making this book to go with the song. First, take a close up digital photo of each child with their mouth wide open. Enlarge the picture and glue it to a sheet of paper. Next, cut letters out of construction paper and glue to the tongue on their picture. Write words for each page to go with the picture, such as “I’ve got D /d//d/ in my mouth.”

Hint! If you don’t have 26 students, then use the principal, secretary, custodian, etc. to complete the letters in the alphabet. 

Body Letters
Have children make letters with their bodies. Take pictures. Put the letters together to make a book.

*Divide children into groups of 3 or 4 and let them lay on the floor to create different letters. Take photos for a book.
                                     

Alphardy (“Sing to Learn” CD)
A for apple /a/ /a/ /a/ (Pretend fist is an apple.)
B for bounce /b/ /b/ /b/ (Bounce a ball.)
C for cut /c/ /c/ /c/ (Open and close index and middle fingers as if cutting.)
D for dig /d/ /d/ /d/ (Pretend to dig.)
E – elbow (Point to elbow.)
F – fan (Fan self with hand.)
G – gallop (Gallop in place.)
H – hop (Hop on one foot.)
I – itch (Scratch self.)
J – jump (Jump up and down.)
K – kick (Little kicks with foot.)
L – love (Hug self.)
M – munch (Move mouth as if eating.)
N – nod (Nod head.)
O – opera (Extend arms and sing dramatically.)
Q – quiet (Index finger on lips.)
R – run (Run in place.)
S – sew (Pretend to hold a needle and sew.)
T – talk (Open and close fingers like a mouth.)
U – upside (Lean over.)
V – volley (Hands in air and pretend to volley a ball.)
W – wiggle (Wiggle all over.)
X – x-ray (Make “x” with arms.)
Y – yawn (Extend arms and pretend to yawn.)
Z – zigzag (Make an imaginary “z” in the air.)
Letter sounds are all you need.
Put them together and you can read! (Hold palms together and open like a book.)

*You can download this book at drjean.org.
http://www.drjean.org/html/monthly_act/act_2005/03_Mar/Alphardy.pdf
                       
*Make the black and white student version for children to take home and sing with their families.
http://www.drjean.org/html/monthly_act/act_2005/03_Mar/AlphardyBW.pdf

*Run off this chart for each student and glue to a file folder. Children can use this for choral singing or for independent work at the listening center. If you give them a pretzel stick or Bugle for a pointer they’ll get a little snack at the end of the song!
http://www.drjean.org/html/monthly_act/act_2010/01_Jan/1books/alphardyChart.pdf


*Insert children’s names in the song:
D for Darren /d/ /d/ /d/
E for Erin /e/ /e/ /e/
S for Sammy /s/ /s/ /s/
H for Hannah /h/ /h/ /h/

*Adapt the words for environmental print:
M for MacDonald’s /m/ /m/ /m/
L for Legos /l/ /l/ /l/

*Take color words, number words, or high frequency words and sing them.
R for red /r/ /r/ /r/
P for purple /p/ /p/ /p/

Letter Tails  (Tune:  "Gilligan's Island")

This is one of my favorite alphabet books that Barb Smith created several years ago.  It's good for letter recognition, phonics, and visual closure (recognizing the whole from the part).

This is a tale about the letter A. 
It makes a special sound. 
/a/ /a/ /a/ /a/ A! 
Let’s learn another sound. 

This is a tale about the letter B….
                                           
http://www.drjean.org/html/monthly_act/act_2013/09_Sep_css/pg06.html

Wednesday, September 28, 2016

A B C ALL THESE ALPHABET BOOKS!

A B C D E F G
Make an alphabet book with me!
H I J K L M N O P
Take a look and you will see.
Q R S T U V
Alphabet books from A to Z!

Here are some alphabet books you might want to create with your class. They are a perfect vehicle for alphabet knowledge, reading for information, reading foundations, and many other language skills. And, you know when your children make a book there is a sense of “ownership” and they will want to read it.
                               
I Can Read!
Take 26 large sheets of paper (12” x 16”) and write a different letter on each page. Put pages between construction paper to make a book called “I Can Read My ABC’s.” Hole punch and bind with book rings. Invite children to bring in words from food labels, stores, catalogs, etc. that they can read. As children bring in their words, help them match up the first letter with the same letter in the book and glue their word on that page.
                    
See & Sign
Enlarge copies of the sign language alphabet. Put a different letter and sign on each page; then let different children illustrate a picture that begins with that sound. Bind together to make a book. Encourage the children to reproduce the signs on each page as they read the book.
*Take digital photos of children making the different signs.
*Cut hands out of felt and glue them to make manual signs.
*You can also make a Braille alphabet book by using drops of glue to represent the different Braille letters.
                                              
Alphabet Art
Write large letters of the alphabet on paper. Give each child a letter and challenge them to create a picture around their letter. “What does your letter look like? Does it remind you of something? Can you use your crayons to turn it into that object? Try to ‘camouflage’ it so no one knows what your letter is.” Put their drawings together to make a book. Can they find the letter hidden in each picture?
*Give each child the letter that their name begins with to make this book.
*Challenge older children to turn their letter into an object that begins with the sound their letter makes.

Touch and Tell ABC Book
Make letters out of different textures, such as sandpaper, felt, yarn, canvas, fake fur, etc.

Deck the Room
Walk around the school and take photos of words for all the letters of the alphabet. Put them together to make a book.
*Sing the book to the tune “Deck the Halls with Boughs of Holly.”
Deck the room with letters and sounds
A B C D E F G
Listen up and look around
H I J K L M N O P
Get a book and you will see
Q R S T U V
Words and letters read with me
W X Y and Z
A for alphabet /a/ /a /a/ B for boys /b/ /b/ /b/ /b/
C for cafeteria /c/ /c/ /c/ D for dumpster /d/ /d/ /d/...

Themes and Holidays
Make alphabet books that coordinate with various themes, holidays, and
seasons. For example, if you are studying the ocean make a “Ocean ABC
Book,” or when it’s spring make “ABC’s of Spring,” or sports, toys, food, or
anything children are interested in.


Tuesday, September 27, 2016

KATALINA MATALINA UPSADINA WALKADINA HOCA POCA LOCA

Katalina and I go back a long time to when I was a girl scout in the 1950’s. I loved her then and children still love her today! She has several cousins, like Hagalena Magalena and Patalina Matalina, but the message is the same. It doesn’t matter what’s on the outside because a kind heart is the most important thing about a person.
                              
Children will love singing this song to the tune of “Shortnin’ Bread.” Then you can use Katalina as a catalyst for reinforcing other skills.

Chorus: Katalina Matalina Upsadina Walkadina Hoca Poca Loca was her name.

          Her head was shaped like a baseball bat. (Point to head.)
          And right on top was a funny, old hat. (Chorus)

          She had two hairs in her head. (Point to hair.)
          One was alive and the other was dead. (Chorus)

          She had two eyes in her head. (Point to eyes.)
          One was purple and the other was red. (Chorus)

          She had two teeth in her mouth. (Point to mouth. Point up and down.)
          One pointed north and the other pointed south. (Chorus)

          Her neck was as long as a ten foot pole. (Point to neck.)
          And right in the middle was a big, black bow. (Chorus)

          Her hips were like two ships in port. (Wiggle hips.)
          One headed south and the other headed north. (Chorus)

          Her feet were as flat as a bathroom mat. (Point to feet.)
          How did they ever get like that? (Chorus)


          But she had a heart, so I’m told. (Put hands over heart.)
          That was made of purest gold. (Chorus)

Here's a link with patterns so you can make your own Katalina:

https://drive.google.com/file/d/0B1SnEagA4jljU0hTRGdIMkVPVWc/view?usp=sharing

Syllables - Clap out the syllables in Katalina’s name. Clap out the syllables in the children’s names in your classroom. Count how many claps in each person’s name. Compare and graph.

Shared Writing - As an interactive writing activity slowly say Katalina’s name. Encourage the children to call out letters as you write them on the board. Make up silly rhymes with children’s names,

Comprehension - Have children close their eyes as you sing the song and create a picture of Katalina in their heads. Give each child a sheet of paper to draw her interpretation of Katalina. Display on a bulletin board or make a class book.
       
Diversity - Talk about what it means to have a heart of gold. Cut out 4 hearts and decorate with gold glitter. Punch holes in the hearts and tie on string to make necklaces. Each day when you see a child being a kind friend, let them wear Katalaina Matalina's heart of gold.
                            
Here is a video where you can hear the song:
https://www.youtube.com/watch?v=xSfEkTogiNg

Monday, September 26, 2016

IS ANYBODY OUT THERE?

Engagement is a term that is appearing frequently in educational discussions because so many teachers seem to be struggling with getting children to focus and pay attention. Children are increasingly disengaging from the real world because they are living in a passive state on the screen.

First thing to do is TURN EVERYTHING OFF! If there is a screen on the children will look at it and not at you.
                                        
Here are some other tips to engage your students.

1. Look children in their eyes and smile. I don’t care where I go when I sing “I like you there’s no doubt about it” I have the children in the palm of my hand.
     I Like You (Tune: “Shortnin’ Bread”)
     I like you, there’s no doubt about it. (Point to self and then a friend.)
     I like you, there’s no doubt about it.
     I like you, there’s no doubt about it.
     You are my good friend. (Point to friend and then self.)

2. Give your students 100% of your attention. Be in the moment!!! Send the message that YOU are the most important thing in the world right now. I’m giving you my best and I need to you to do the same.

4. Be enthusiastic! Teachers can add the magic to anything with their facial expression, voice, and body language.

5. Be dramatic and break into a song or do something silly. The brain loves novelty!

6. Physical proximity! Get close to your students. Create an intimate space by having the children sit on the floor in a circle. A gentle touch can send a positive message to the brain.

7. Use their name frequently. You might have a child day dreaming and simply saying their name will bring them back to reality.

8. Do a movement activity to focus those busy hands. Lead children in a cheer or a clapping pattern. Use call backs and attention grabbers.
     Tootsie Roll
     Tootsie roll, (Roll hands around each other.)
     Lollipop. (Pretend to lick a lollipop.)
     We’ve been talking, (Open and shut fingers.)
     Now let’s stop! (Make sign language sign for “stop.”)
                               
     Give Me a Clap (Tune: “Addams Family”)
     Give me a clap. (Clap twice.)
     Give me a clap. (Clap twice.)
     Give me a clap, give me a clap,
     Give me a clap. (Clap twice.)
     Give me a snap. (Snap twice.)
     Give me a snap. (Snap twice.)
     Now fold your hands and put them down
     Into your lap. (Model putting your hands in your lap.)

     Call Backs
     Teacher says: Hands on top (Place hands on head.)
     Children respond: Everybody stop (Children freeze.)
     Teacher says: Macaroni and cheese.
     Children respond: Freeze please (Children freeze.)
     And so forth….

     Hamburger Cheer
     Show me your hamburger meat. (Hold out palms.)
     Make a hamburger. (Pretend to pat meat between hands.)
     Put it on the skillet. (One palm out facing down.)
     Ssssssss! (Make sizzling sound and wiggle hand.)
     Is it done?
     Not yet. (Turn over palm and shake head “no.”)
     Ssssssss! (Make sizzling sound and wiggle hand.)
     Is it done?
     Not yet. (Turn over palm and shake head “no.”)
     Ssssssss! (Make sizzling sound and wiggle hand.)
     Is it done?
     Well done! (Thumb up!)
                                                                       
9. Use positive redirection to get them to do what you want them to do. Instead of saying, “Sit down and be quiet,” trying singing this tune:

     Head, Shoulders, Knees, and Lap  (Tune: "Head, Shoulders, Knees, and Toes")
     Head, shoulders, knees, and lap, (Point to appropriate body part.)
     Knees and lap.
     Head, shoulders, knees, and lap, (Point to appropriate body part.)
     Knees and lap.
     Legs are criss-cross applesauce (Cross legs and fold hands.)
     And our hands are in our lap, lap, lap.

10. Lower your voice and pretend to be calm as you cross your hands and smile.

I’m doing two free concerts at Charleston schools this afternoon and you better believe I’ll be putting my money where my mouth is and using these strategies! If I get home in time I’ll go live on Facebook and demonstrate some of these. Stay tuned about 5 EST!

Sunday, September 25, 2016

COMIC BOOK DAY

Did you know that today is National Comic Book Day? What a treat when I was a kid to get a new comic book! No, we didn’t have videos or computers, but friends would come over and we’d read comic books together. I know! I know! Sounds corny now, but it was a favorite indoor pastime when the weather was bad. Let me tell you, if the weather was good our mothers would say, “GO OUTSIDE AND PLAY!”

I also remember sitting on my grandpa’s lap as he’d read the Sunday comics to me. I think the cartoons were much more “child friendly” in the 50’s than they are now. However, it might be interesting to save some of the comics from the newspaper this weekend and share them with your class. Explain how cartoonists use “bubbles” to let you know what the characters are saying.
                             
Invite children to draw a picture of you and make a bubble with something you frequently say coming out of your mouth. You might be surprised!!!!

You could also let the children draw pictures of themselves or their friends and then use bubbles to make them talk.

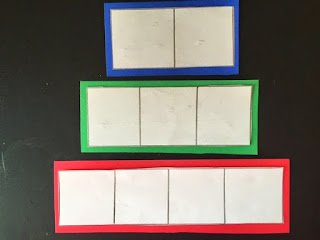
Comics can also be used to reinforce standards. Start off by giving children copies of a cartoon frame with 2 sections. Tell them to think of a story that has a beginning and an end and draw it.

Next, let them think of a story with a beginning, middle, and end.

Finally, challenge them to create a story with 4 sections.

*Have children recall the sequence of a story with comic frames.

*Use comic frames to illustrate the life cycle of a butterfly, the water cycle, plant growth, and so forth.

Here’s a link to download blank cartoon frames:
                             
https://drive.google.com/file/d/0B1SnEagA4jljTjMyU21nWDZTN00/view?usp=sharing

Cartoons That Move
Would you like to learn how to make cartoons that move? It’s easy peasy, but you’ll surely impress your students when you teach them how to do this.

Hint! I would only do this with primary grade children.

Materials: white copy paper, stapler, black pen or pencil

Directions:
1. Fold the paper into fourths and cut on the creased lines. 

                  
2. Take two sheets and staple them at the top.
3. Lift the top layer and draw a simple shape on the bottom. Keep your drawing on the bottom half of the page. 

              
4. Now, place the top sheet over the bottom and trace over the lines. Vary one or two features, such as arms, ears, mouth, etc.
5. Take a pencil and roll the top sheet up around the pencil.
6. Quickly move the pencil up and down to bring life to your cartoon. Waalaa!
                                 
*Connect this activity to literature, science themes, or social studies.

Saturday, September 24, 2016

JUMP, MARCH, AND BRAIN FREEZE!

Here are a few more neurobics exercises that will energize children's brains.

Jumping Brains
Materials: None
Directions: Ask children to stand and challenge them to jump in their space as long as they can. When they get tired they can sit back in their seats.

Hint! Have children look at the second hand on the clock to see how long they can jump. Record the seconds. Each day practice “jumping” and have them record how their time improves.

Adaptations: Say traditional jump rope rhymes as the children pretend to hold a rope. Here’s a video where you can jump with Dr. Jean.

                                             
https://www.youtube.com/watch?v=6Y1UBTOFEzA&list=PL7bsHC8DZJxh3UuXWDyOXZ1c_dGBUdxOA&index=43

Brains Go Marching
Materials: marching music
Directions: Children can get an amazing amount of exercise simply by standing and marching in place. Here are some different ways you can march. Can your students add to the list?
                                    
Power march by swinging arms up and down as you lift your knees high.
March slow and then march fast.
March in a circle and then turn around and march in a circle in the opposite direction.
March like a toy soldier with stiff arms and legs.
March high and then march down low.
March on tippy toes.
Swish arms back and forth like windshield wipers as you march.

Adaptations: March with Dr. Jean on this video:


https://www.youtube.com/watch?v=P1jEZ9vSmdA&list=PL7bsHC8DZJxh3UuXWDyOXZ1c_dGBUdxOA&index=2

Brain Freeze
Materials: dance music
Directions: Have students fine their own space. Explain that when the music starts they can start dancing. As soon as the music stops they must freeze.

Adaptations: Play a game where if they move when they should be frozen they have to sit down and they are out of the game. Who can be the last one standing?

Hanky Panky
Materials: white handkerchief, scarf, or tissue
Directions: Tell the students when you throw the handkerchief up in the air they can start doing a silly dance and make funny noises. When the hanky hits the ground they must freeze. Do this several times to get rid of wiggles.

Here’s a link for a webinar I’ll be doing on brain breaks on October 20th:
http://ow.ly/DQms304ddck

Friday, September 23, 2016

GIVE YOUR BRAIN A BREAK!

I’ll be in Orlando at the Florida AEYC Conference this weekend. Here are a few brain breaks I’ll be doing with the teachers. (You know these activities are good for children AND adults!)

Brain breaks are short movement activities that help children focus and give them a positive outlet for energy and wiggles. Here are two simple activities you can use between lessons, during transitions, or whenever your students are restless.

Hint! Before doing these activities ask children to show you their “body space” by extending their arms slightly and twisting around. Remind them to stay in their body space as you do these activities.

Shake Down
Materials: None
Directions:
Hold up your right hand and shake five times as you count.
1, 2, 3, 4, 5.
Hold up your left hand and shake five times as you count.
1, 2, 3, 4, 5.
Hold up your right foot and shake five times as you count.
1, 2, 3, 4, 5.
Hold up your left foot and shake five times as you count.
1, 2, 3, 4, 5.
Count to four with each arm and leg…then three…two…one.
End by saying, “Oh yeah!” as you extend your arms and make the letter “Y.”
                                 
Adaptations: If children are wound-up do this with a whisper voice.

*Count to five in different languages.

*Do the vowel shake down where you say, “A, E, I, O, U,” and the “E, I, O, U,” and then “I, O, U,” and so forth.

Balancing Brains
Materials: None
Directions: Have children stand. How long can they balance on their right foot? How long can they balance on their left foot?

Can they balance on their toes?

Can they balance on their right foot and extend their left leg in the air?

Can they balance on their left foot and extend their right leg in the air.

Can they balance on one foot with their eyes closed?
                              
Adaptations: Have children choose a leg and balance. When they lose their balance they have to sit down. Who can be the last one standing?

Thursday, September 22, 2016

MY GREAT STATE!

A teacher from Indiana sent me a text asking for this chant because they are celebrating Indiana’s bicentennial. No matter what state you live it, it’s important for the children to know the name of their state and have a sense of pride. It’s also good for oral language because children repeat each line.
                                               
Hint! Have children sign the first letter in their state to prompt them for the song.

Chorus:
State name.  (Children repeat each line.)
State name.
State name.
Is the best, is the best, is the best state.

Boys and girls come to school.
They learn to read and write.
Making books and writing words -
They really are so bright.
Chorus

Boys and girls learn to count.
They also know their shapes.
They learn to add and subtract.
Their teachers think they’re great.
Chorus

Boys and girls make new friends.
They learn to follow rules.
They laugh and cheer and sing a lot.
It’s cool to be in school.
Chorus

Hint! The more dramatic you are on the chorus, the more fun it will be. Sing like an opera star, loud, and then end in a whisper.

Note! This song was originally the “Alligator Chant.” I adapted it for different age levels (such as “kindergarten” or “first grade”), but it also works for the state.

Here is another simple tune to help children identify their city, state, country, and continent.

My World (Tune: “The Wheels on the Bus”)
In this song, you’ll have to fill in the name of your school, city, state, country, continent, and planet.
The name of my school is ___, ___, ___.
The name of my school is ___.
That’s the name of my school.

The name of my city is...

The name of my state is...

The name of my country is United States…

The name of my continent is North America…

The name of my planet is Earth…

State Song (Jodie Slusher)
Tune: “Farmer in the Dell”
Virginia is our state.
Richmond is our capitol.
Virginia is our state.

*Insert your state and capitol.

My State Book

Make a state book based on your state flower, animal, famous people, state bird, capitol, flag, insect, famous places, etc. Children can become EXPERTS about their state.

For example: New Hampshire, New Hampshire, what do you see?
I see the Capitol in Concord looking at me.
Capitol in Concord, what do you see?
I see the purple lilac looking at me…
                             
*The teacher who shared this idea said her kids loved reading this book and the parents were so impressed that their children knew more than they did about the state!

Wednesday, September 21, 2016

A TREE FOR ALL SEASONS

If you saw my "Facebook Live" on Monday this is what I demonstrated.  It's a great hands-on project that you can use in a multitude of ways in your classroom. 

Directions:  Tear (or cut) four strips from the top of the bag to the flap. Open. Squeeze the middle of the bag and twist. There’s your tree and here are some possibilities…
                                    
Chicka Chicka Boom Boom Tree – Let children write letters or use letter stickers to make an alphabet tree.

Orchard – What are some different things that grow on trees? Children can draw or cut fruits and nuts out of construction paper and make their favorite tree.

Word Family Tree – Children choose a rime and then write all the words they can think of that end with that sound.

Family Tree – Children write the names of people in their family on the tree.

Spooky Tree – Twist the ends of each strip to look like old limbs. You can add bats or owls if you like.
              
Seasonal Tree – Children tear pieces of orange, red, and yellow paper and glue to the strips to make an autumn tree.
                                            
For winter dip a sponge in white paint and use like snow to make a winter tree.

In the spring tear pink or white tissue paper into small pieces and wad up. Glue to the limbs to make a spring tree.

Paint the strips green to make a summer tree. Add birds or butterflies.

Fall Centerpiece – Here’s an idea for you if for a party this fall. Use a large brown grocery bag to make a tree. Add autumn leaves to the base of the tree or hang Halloween ornaments on the tree.  I make this every year and people think I'm Martha Stewart!!!! 


Tuesday, September 20, 2016

WORLD GRATITUDE DAY

September 21st is actually World Gratitude Day, but I wanted to give you a heads up for tomorrow so you might include a little something special in your lesson plans.  World Gratitude Day was started in Hawaii in 1965 at an international gathering and the founders explain why:

The awareness of the benefits of having time in one’s life for gratitude, appreciation, and positive reflection have become increasingly apparent. The hope of the founders of Gratitude Day is that by taking time, one day a year, to reflect on the many amazing things we have in our lives, it would positively impact our well-being and make us happier, more contented people.


Yes, there are problems in the world (many, many problems) and difficulties with our jobs as educators (many, many troubles), but, just for today, look for the good and be grateful. Start the day by telling your students something you are grateful for and then ask them to each state something they are grateful for. As a writing activity, let them make a “grateful web” or a book called “Things to Be Happy About.” They could also make a collage in art by cutting out pictures from magazines or the newspaper of things they are grateful for.
                             
“With Apologies to None” is something I found years ago. I have no idea of the original source, but I share my version with you today.

  
WITH APOLOGIES TO NONE

When I am introduced as a teacher, I generally hear a very flat, “Oh.” I have never been certain whether that is an expression of sympathy, pity, or disinterest. Always I wish I had time to explain to them like this. Yes! I’m a teacher and I love my job!

Where else would a handsome and very young man put his arms around me and ask, “Do you know I love you?”

Where else could my limited wardrobe be complimented or have someone say, “You sing pretty.”

Where else could I eat a soiled cookie from a grimy little hand and not become ill?

Where else could I have the privilege of wiggling loose teeth and receive the promise that I may pull them when they are loose enough?

Where else could I guide a chubby little hand that some day may write a book or important document?

Where else could I get to play outside, laugh, sing, read and get paid for it?

Where else could I forget my own aches and pains because of so many scratched knees, bumped heads, and broken hearts that need care?

Where else could I forget about taxes and our country’s political problems because Josh isn’t adjusting as he should and Margo needs help with her math?

Where else could my mind stay so young as with a group whose attention span is so short that I must always keep a bag of tricks up my sleeve?

Where else could I feel so good at the end of each day because I made a child smile, taught a child to read, helped a child believe in herself, gave a child a dream, and made this world a better place.

Yes, I’m a teacher and I LOVE my job!

                                
I REALLY DO LOVE MY JOB AND I'M GRATEFUL FOR YOU!

Monday, September 19, 2016

LEAVES WITH STEAM

Take advantage of the science lab on your playground with these leaf activities.
                                    
Leaf Hunt - Give each child a lunch sack and let them collect 2 or 3 leaves from the ground. Bring these back in the classroom and sort by shape, color, etc. You could also graph the leaves by shape. (Whenever you collect items outside emphasize the importance of taking things from the ground. Return the objects to where you found them after exploring with them in the classroom.)

Science Center - Let children investigate leaves in the science center with a magnifying glass or microscope.  Ask children to draw the enlarged leaf.
Hint!  You can also take a photo of a leaf with your phone and enlarge it to show the veins and details.

Research – Check out a leaf identification book from the library. Can children match up their leaves with those in the book to identify which tree they came from?

Leaf Rubbings - Lay a sheet of paper on top of a leaf. Remove the paper from an old crayon and rub the side over the leaf to make a print.Hint! Use rubber cement to glue the leaf to the table. It will be easier for the children to make a rubbing, and you can just rub off the rubber cement after the activity.
              
Leaf Book - Let each child find a "favorite" leaf. To preserve, place the leaf in a sheet of newspaper and put a book on top overnight. Place the leaf in a zip baggie. Encourage children to dictate or write a sentence about their leaf.
                                 
*Put several baggies together to make a book.

I Wonder Why? - Brainstorm why leaves turn colors and fall off trees in the fall. Have children go home and do a little research with their parents and report results in class the following day.

Deciduous Trees (Sandra Kelley)
Tune: "Do Your Ears Hang Low?"
Do your leaves fall down?
Do they tumble to the ground?
Do you lose your leaves in the fall?
Then you are deciduous that we know
because in the fall your leaves all go!

*What's the difference between deciduous trees and evergreen trees? Take a nature walk and ask children to identify both types of trees.


Sunday, September 18, 2016

YA'LL - IT'S ALMOST FALL!!!


The first day of fall is Thursday, September 22nd. Here some activities to celebrate this week!

Leaves Are Falling
(Tune: “Where Is Thumbkin?”)
Leaves are falling (Echo song. Children repeat each line.)
Leaves are falling (Flutter fingers down.)
To the ground. (Touch the ground.)
To the ground.
Red, orange, and yellow (Flutter fingers.)
Red, orange, and yellow
Falling down. (Touch the ground.)
Falling down.
               
*Let children dramatize being leaves and dancing in the wind. As the song ends they fall quietly to the ground.

*What happens to leaves after they fall from the trees? Later in the fall when there are lots of leaves on the ground demonstrate how to pick up a handful of leaves and crumple them in your hands. Explain how those leaves will decay and turn into soil.

Fall
Why do you think they call this season “fall”? What’s another name for fall?
What season comes before fall? What season comes after fall? Fall is a cool off time between hot summer and cold winter.

Signs of Fall
Brainstorm signs of fall and write them on the board. What kind of clothes do we wear in fall? What’s the weather like in the fall? Are there any special seasonal foods we eat? What kind of sports are popular in fall? What holidays do we celebrate in the fall? What do animals do to get ready for winter? What do plants do in the fall?

*Let children make an attribute web and label it with pictures or words of things that remind them of fall. Older children can do this as a writing assignment, but for younger childr
en this can be an opportunity for the teacher to model writing and develop vocabulary.
                                 
Nature Walk
Go on a nature walk and look for signs of fall. Provide children with tablets, paper, and pencils so they can record their “observations” on the walk.

I Like Autumn Language Experience Chart
Let children dictate sentences about why they like autumn. Older children could write their own original stories about, “Fall, Fall, Best of All!”

Acrostic Poem
Write the words “fall” or “autumn” vertically down the side of a sheet of paper. Children think of a word that starts with each letter that relates to fall.