photo 3am_dj_home_zps919fb85e.png photo 3am_dj_about_zps7cce4c75.png photo 3am_dj_website_zps73051235.png photo 3am_dj_ss_zps6759ec2a.png photo 3am_dj_bs_zps43e27832.png
Showing posts with label Learning Center. Show all posts

Saturday, October 25, 2025

CVC WORDS

The ability to blend simple three letter words is a big step in learning to read. Here are some hands-on activities where children can identify initial, medial vowel, and final sounds.

Body Touch
Blend words touching parts of the body. Touch the head as you say the beginning sound in the word. Touch the stomach as you say the middle sound. Touch the feet as you say the final sound. Quickly move from head to feet and blend the sounds. Next, challenge children to isolate where they hear the sound.
For example: Where do you hear the /p/ in cap? (Children touch toes.)

Park the Car
Make a parking lot with three spaces. As you say a word children park the car according to where they hear the sound (beginning, middle, end) of the word.


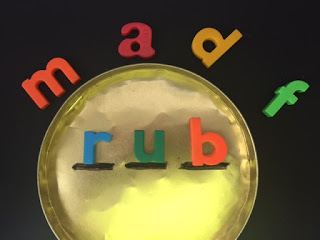
Letter Tin
Place magnetic letters inside a cookie tin. On the inside cover make three lines with a permanent marker. Have the children take out the letters and place them around the lid. Call out a sound and have the children select that letter and place it on the first line in the lid. Call out a second sound. Call out a third sound. Blend the sounds and read the word.


Hint! Adapt the number of letters to the ability of the students.
*Store small magnetic letters in a breath mint tin.
*Let children use magnetic letters on a cookie sheet.

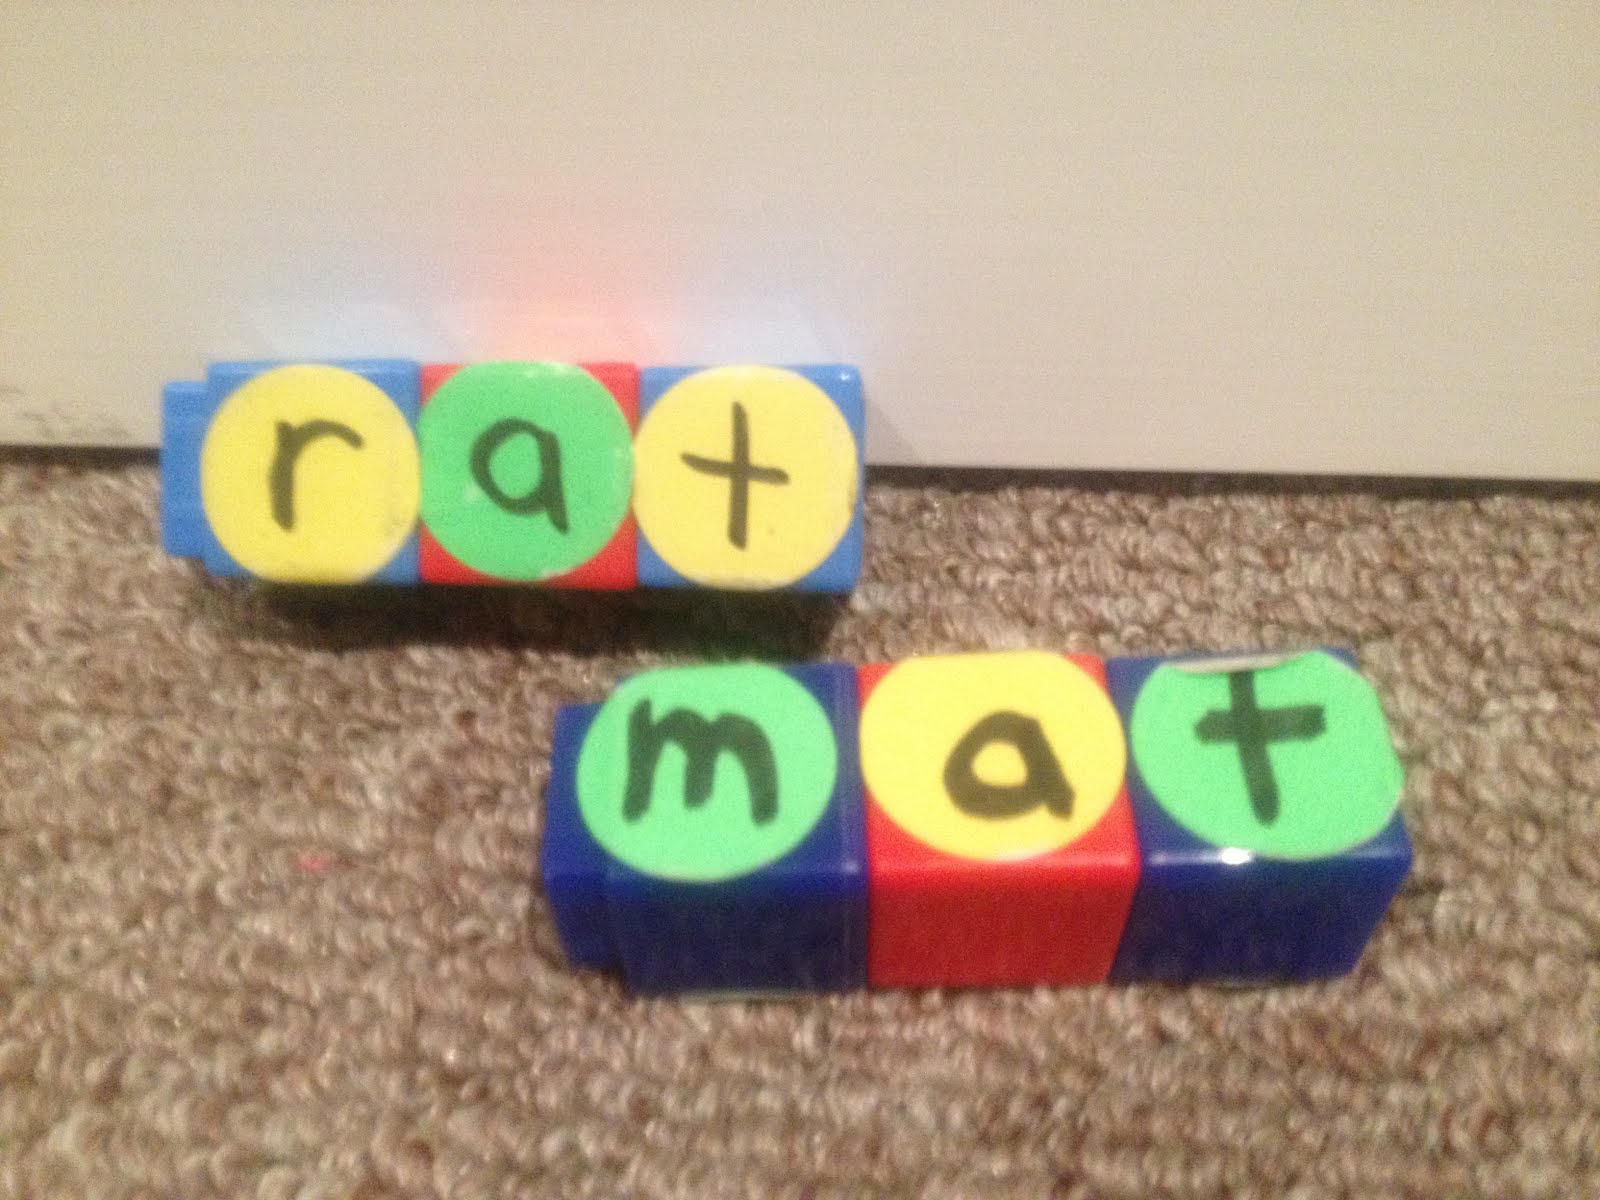
Unifix Cubes
Place dot stickers on unifix cubes. Write letters on the dots. Children can use these for constructing words.

Donut Words
Cut donut shapes out of construction paper. Write consonants on either side of the donut as shown. Write vowels on small circles. Children place the donut “holes” between the consonants and blend the sounds.


Phonics Fingers
You will need 3 pairs of white cloth garden gloves for this project. Cut the fingers off the gloves. Write a letter on each finger with markers. (Write consonants in blue and vowels in red.) Children insert glove fingers on their own fingers to make CVC words. Have them substitute letters to make new words.




Tuesday, September 16, 2025

PLAY DOUGH DAY

Play dough is multi-sensory, engaging, creative, and open-ended. Talk about PURPOSEFUL PLAY! National Play Dough Day is September 16th, but you can use it every day as a tool just like a worksheet or video game. Play dough also develops small motor skills which help children write. Here are just a few ways to integrate it into centers and independent learning in your classroom.

Comprehension
Let children make their favorite character and use it to retell a story.


Make something that you learned from the book.


Phonics
Rhymes – Make two objects that rhyme.


Sounds – Make objects that start with a consonant, blend, or diagraph you are working on.
Vowels- Make an object for a long vowel sound and short vowel sound.

Writing
Make something you like (or don’t like) and write about it.

Make something from a book you have read and write about it.

Make letter plates by writing letters with a permanent marker on plastic plates. Children roll play dough and make the letters on top.


Make letters (or words) using a bubble font. Children roll dough and fill in.

Make something that is a noun. How can you make it plural?


Math
Make objects that match numbers.


Make a set and then decompose it.


Science and Social Studies
Reinforce information from a science or social studies unit with play dough. Children could make animals from a habitat, parts of a flower, tools of community helpers, healthy foods…endless possibilities! 

Here's a link for my FREE Play Dough book:


Play Dough Book is 46 pages of ideas and activities.

.

Friday, November 15, 2024

NATURE CENTER

Children love to collect things. Aren't they always bringing you rocks or leaves or flowers or nuts? A nature center would be a perfect place to display their treasures and give them the opportunity to observe and investigate natural items. You can purchase commercial kits, but you could also create a nature center from natural objects in your habitat. All seasons offer interesting things for your children to explore.


Store Bought


Homemade!


Materials:

basket of leaves, rocks, shells, pine cones, sticks, nuts, or other natural items (rotate for different seasons)
magnifying glass
clipboard, pencils, paper
ruler
field guide book (leaves, rocks, shells, etc.)

Activities:

*free exploration
*sorting
*counting
*seriating by size
*measuring
*observing with a magnifying glass
*sketching with a clip board
*identifying with a field guide book
*non-fiction writing
*PLAYING!


FREE, GREEN, ENGAGING, OPEN-ENDED, EASY - IT'S A WINNER!!!

Monday, September 30, 2024

BATS AND SPIDERS AND MATH - OH MY!

You can take any seasonal objects like erasers, small toys, or natural items (leaves) and turn them into learning materials.  Here are some ways to use bat rings and spider rings this month for hands-on math.


Note! I took my scissors and snipped off the ring part to make them easier to manipulate. I also removed the skeleton rings because I thought some parents might object. (I just try to keep everybody happy!)

Sort 
Ask children to sort the rings. What was their sorting rule? Can they sort them another way? 


Sets 
Draw spider webs and label with numerals or number words. Children make appropriate sets. 


*Use bat rings in spooky trees. Let children roll dice and make the amount.

Guess and Check
Put different amounts of rings in bags or cups. Write letters on the cups (A, B, C...). Children count and then record their answers.  


Addition and Subtraction
Children can work out math problems with the spider rings.


Fill the Cup (I learned this from Carolyn Kisloski.)
Two or more children can play this game. You’ll need cups, plastic toys, and dice. Children take turns rolling a die and then counting out that many objects and placing them in their cup. The first one to fill their cup is the winner. To extend the game, continue playing to see who can empty their cup first.

*Use two dice so the children can practice addition.

Estimate
Fill a plastic jar with plastic toys. Children estimate how many and then write it on a sheet of paper with their name. At the end of the day count the objects. Who guessed more? Less? Who was closest?

Patterns
Can children continue a pattern with the toy rings? Can they create an AB, or ABB pattern?


Position
Give each child a spider ring. Can you put it above your head? Can you put it beside you? Can you put it between your knees? Etc.

Bats in a Cave
Make a cave from a disposable bowl by turning it upside down and cutting an arch as shown. Display a certain number of bats. Put some in the cave and ask children, "How many do you see? How many do you think are in the cave?"

Saturday, August 17, 2024

WRITING ROUND THE MULBERRY BUSH

One of my favorite pre-writing activities at the beginning of the school year is called “Writing Round the Mulberry Bush.” I clearly remember where I got this idea. About 15 years ago I was doing a workshop in Huntsville, Texas. A young teacher said, “My mentor needs to tell you how she teaches handwriting. Her kids have the best handwriting in the school.” Well, she grabbed my attention and when I asked the older teacher her secret she smiled and said they practiced “Writing Round the Mulberry Bush” several weeks before introducing letters.

Basically, you have children make the strokes as shown on a blank piece of paper as they sing the different verses to the song “Here We Go Round the Mulberry Bush.” It makes sense because children need to go from top to bottom and left to right as they learn to master simple strokes.


https://drive.google.com/file/d/0B1SnEagA4jljSUZWMl9YZVh4UVE/view?usp=sharing


Good teaching is good teaching, and I’m going to let Denise Brackenridget Brownlee tell you how she adapts this activity in her classroom.

At the beginning of the year we did not begin by writing names. Instead we began with your “Here We Go Round the Mulberry Bush” song. We incorporated the song in a multi-step process.

1st We began by singing the song on the carpet. As we sang, I would write the marks on the board. After many exposures, children would join me by writing it with 2 fingers on the carpet or in the air.

2nd We then transitioned to the salt trays. Children had the opportunity to explore the salt. We also discussed how to gently shake the tray to "erase" your writing. We began by using fingers to draw as we sang. Then we transitioned to unsharpened pencils.


As you can see in the photos, children were at various skill levels and worked at different paces. I sang the song slowly as I would walk around the table to assist children with the direction they were writing.

3rd In our final step we moved to a worksheet that I created. As we sang the song, we now drew the marks in the boxes. I would model this as well. I kept a paper from the 2nd or 3rd day in their portfolio. We worked on this process for a couple of weeks. It was pretty amazing to see the difference from the first worksheet to a worksheet a few weeks later. Later on I was able to tie the concepts that we used with Mulberry Bush into name writing.

Note! I did this activity right before parent conferences. It was a great way to demonstrate to families how much their child's fine motor skills were developing.

I loved how much we were able to incorporate this song into so much of what we did. The kids greatly enjoyed it and it was valuable as a writing foundation in my TK classroom.


Thursday, April 25, 2024

SEA SCIENCE

If you're going to the beach save some shells and sand. If you're not going to the beach you can still do these science activities.

Sink and Float
You’ll need a file folder, tub of water, and a collection of small objects (pencil, crayon, paper clip, ball, block, pebble, leaf, etc.) On one side of the file folder write “float” and on the other side write “sink.” Children place the items according to whether they think they will float or sink. They can then test each object by putting it in the water and readjusting where it should go.


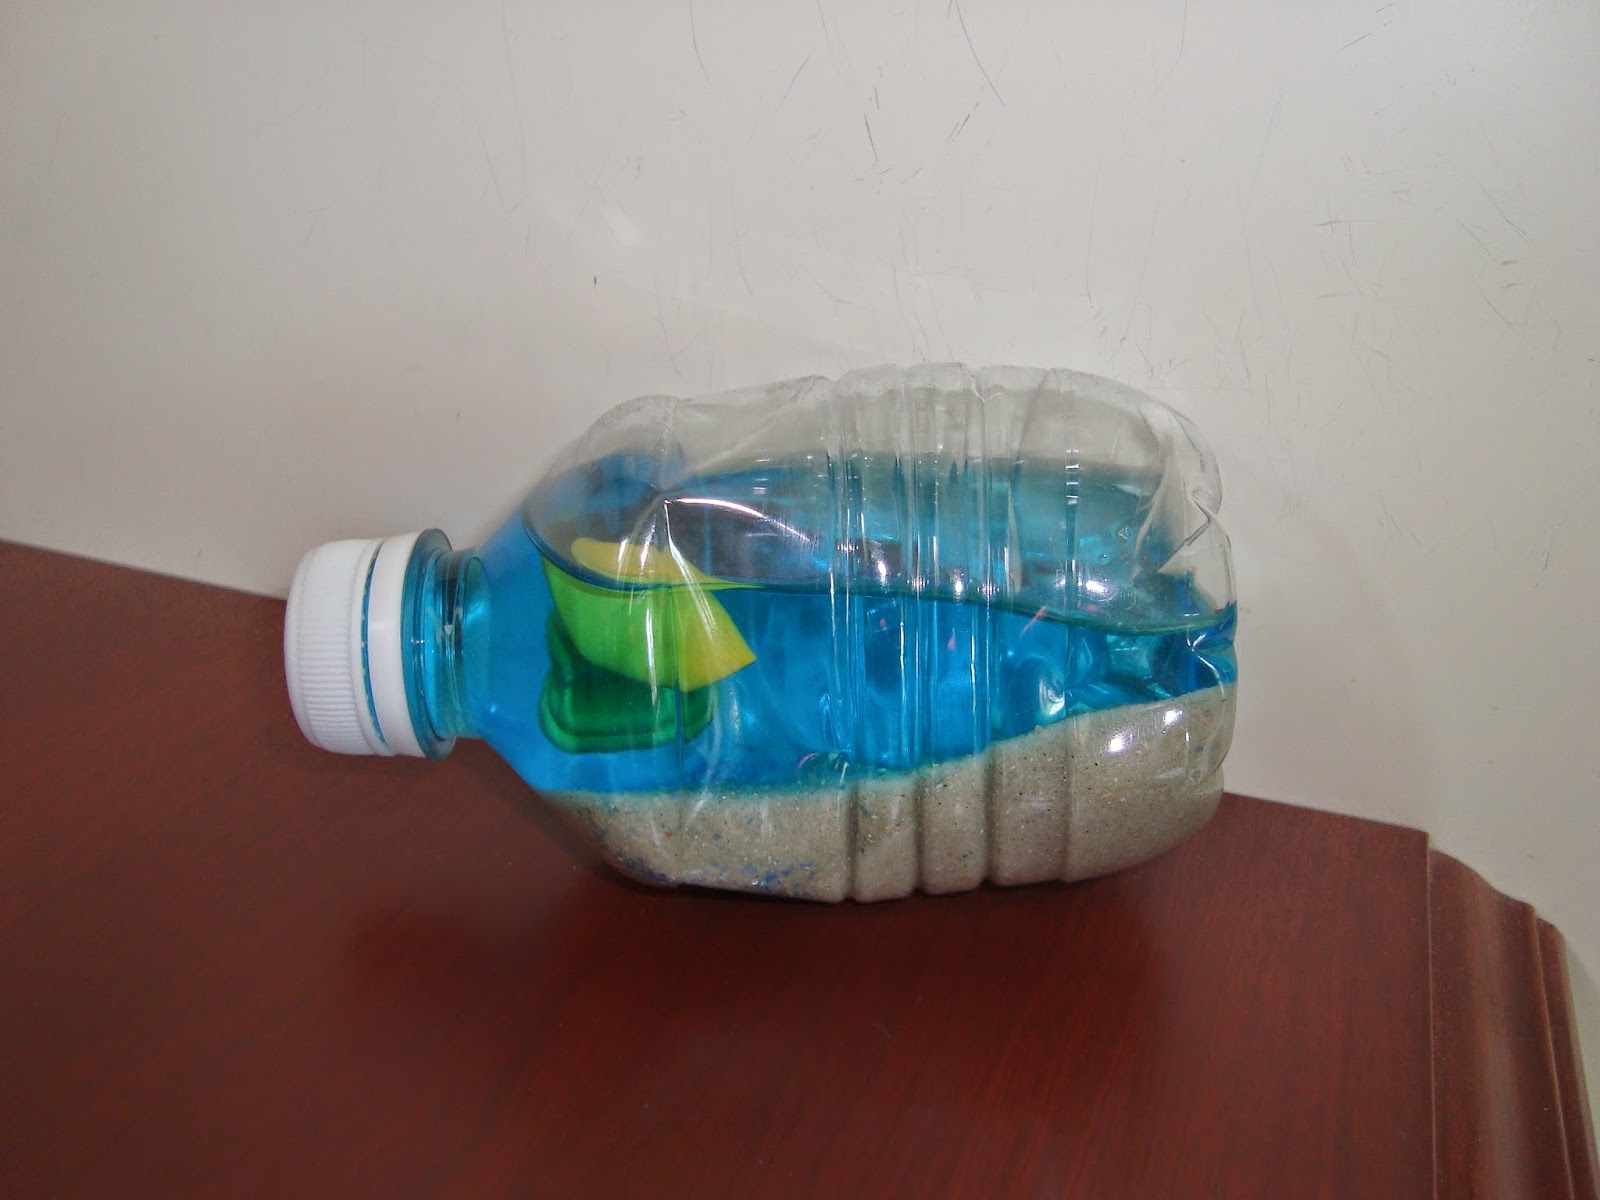
Beach Bottle
Put ½ cup sand in a bottle. Add some shells and fill half way with water. Add a drop of blue food coloring. Make a small fish from Styrofoam or a water balloon.


Wave Bottle
Fill 2/3 full with water. Add a drop of food coloring. Fill to the top with vegetable oil or Baby oil. Slowly rotate the bottle on its side to make waves.
*Add glitter if you like.


Sand Collections
Collect sand from various beaches in jars or bottles and label. Children can use a magnifying glass to observe the contents. How are they alike? How are they different?

*They could do descriptive writing about what they see in the bottle.

*A good way to get sand samples is to have children write friends and relatives who live near a lake or ocean and ask them to sand a small bag of sand to their class. (Be aware that there are some restrictions as to sending natural objects into the continental 48 states.)


Research

Purchase a bag of shells from a dollar store and put it out with a book about seashells. Children can look through the book and identify the shells.

Friday, January 26, 2024

THE POWER OF PLAY DOUGH

Play dough can be a learning tool just like worksheets and computer games. Although play dough wasn't invented until the 1950's, molding materials, such as clay, have been an integral part of early childhood programs forever. For thousands of years children have joyfully played with mud and sand.

Here's a FREE book for you on PLAY DOUGH POWER! 
http://bit.ly/drjeanPlayDoughPower


and here's where you can watch the video:


Brain Research
When children tap and swipe on a device or sit passively gazing at a big screen there is little sensory input in the brain. We know that the only way information can get IN the brain is through the senses. Think about how much more input there is when children touch, see, talk, and hear when they are using play dough.

Small Motor Skills
Pinching, squeezing, rolling, and molding dough is like sending little fingers to the gym. Many children's small muscles are not developed and they struggle to hold a pencil and write. Play dough is a natural way to strengthen those little hands.


Social Skills
All you have to do is put out some play dough for a small group of children and observe. They will learn to share and spontaneously communicate with their friends about what they are making. They'll also challenge their friends to be creative.

Emotional Skills
Play dough is a great release for children who are stressed or have the fidgets. As they manipulate the material they can release pent up energy and calm themselves.

Imagination
So many crafts and things we give children have steps and a "model" for them to reproduce. Play dough is a blank canvas that can be turned into anything! Whatever the child creates is theirs and represents the "process" rather than the "product."


Hint! You'll find these center ideas using play dough in the free download.


The Play Dough Song Tune: “Row, Row, Row Your Boat”
(Children make the motions with the play dough as they sing.)
Squeeze, squeeze, squeeze play dough (Children squeeze dough.)
Feels so good to me.
Squeeze, squeeze, squeeze play dough
It’s easy peasy! 

Poke – Poke fingers in the dough. 

Pinch – Pinch off pieces of the dough. 

Roll – Roll the dough into a snake. 

Pat – Pat like a pancake. 

GLUTEN FREE PLAY DOUGH
You know, I never thought about children with gluten allergies having a reaction to most play dough recipes.  Fortunately, my good friend Barbara Lees shared this recipe with me!!!  Thanks, Barbara!


Wednesday, October 11, 2023

MAGIC MAGNETIC LETTERS

Magnetic letters are inexpensive, durable, and plentiful. Best of all they are REAL (as opposed to a screen)! These activities can be adapted for many different skills and age levels.


Can You Find Bottle?
Fill a large plastic bottle with salt or sand. Insert magnetic letters and shake. Children shake the bottle and try to identify letters.

*Give them a grid with the alphabet letters. They can color in the letters as they find them in the bottle.

Sand Box Treasure
Hide magnetic letters in your sand table. Children can take a magnet and try to identify letters they “attract.”

*Can they make the sound? Can they think of a word that starts with that sound? Can they write a word that starts with that sound?

*Hide the letters in Styrofoam packing. Add a clipboard, paper, and pencil for children to write the letters as they find them.

Touch and Tell
Place a magnetic letter in a sock. Can children reach in the sock and identify the letter by feeling it?

Letter Password
Place several letters you are working on around your door frame. As children leave the room, ask them to touch a particular letter. (You could also ask them to touch the letter they hear at the beginning of particular word.)

Letter Tin
Place magnetic letters inside a cookie tin. Make three lines with a permanent marker on the inside of the lid. As you call out sounds children place the letters on the lines to make CVC words.

Hint! Place in a center for children to make and write word families.

Building Words
Demonstrate how to build words with magnetic letters using a document camera.

Alphabet Soup
Place magnetic letters in a mixing bowl. Children take a big spoon and scoop out some letters. How many words can they make with their letters? Ask the children to write the words they can make.


What’s My Letter
Have children cup their hands and then distribute a letter to each. Children give clues to help their friends identify their letter.

For example: My letter is made with two straight lines. You hear it at the beginning of turtle and at the end of bat. What’s my letter?

*Number socks for older students and let them record their answers.

Letter Hunt
Hide magnetic letters around the classroom as the children hide their eyes. Explain that they can only find one letter at a time. They have to bring the letter to the teacher, identify it, and then hide the letter again.

Fistful
Put magnetic letters in a lunch bag. Ask children to reach their hand in the bag and pull out a fistful of letters. How many words can they make with those letters? Ask them to write the words.


MAGNETIC LETTER MUSIC VISUALS
These visuals will engage children’s attention in the letters as you sing.

The Letters on the Bus
Draw the shape of a bus on a magnetic board. Place letters in the bus as you sing this song to the tune of “The Wheels on the Bus.”

The A on the bus goes
/a/ /a/ /a/
/a/ /a/ /a/
/a/ /a/ /a/
The Aon the bus goes
/a/ /a/ /a/
On the way to school.
If you have a toy bus, write the letter on an index card and tape it to the bus as you sing.

You could also download this pattern to use with magnetic letters.

http://www.drjean.org/html/monthly_act/act_2011/09_Sept_css/pg00.html

Who Let the Letters Out? 
Place letters in a dog dish or empty box of dog biscuits. Children reach in and pull out one letter at a time as you chant:

Who let the D out?
/d/ /d/ /d/ /d/ /d/